
How to Block Crochet: Wet, Spray & Steam Blocking for Any Yarn
Learn how to block crochet the right way for wool, cotton and acrylic: step-by-step wet, spray and steam blocking, tools, drying times and mistakes to avoid.

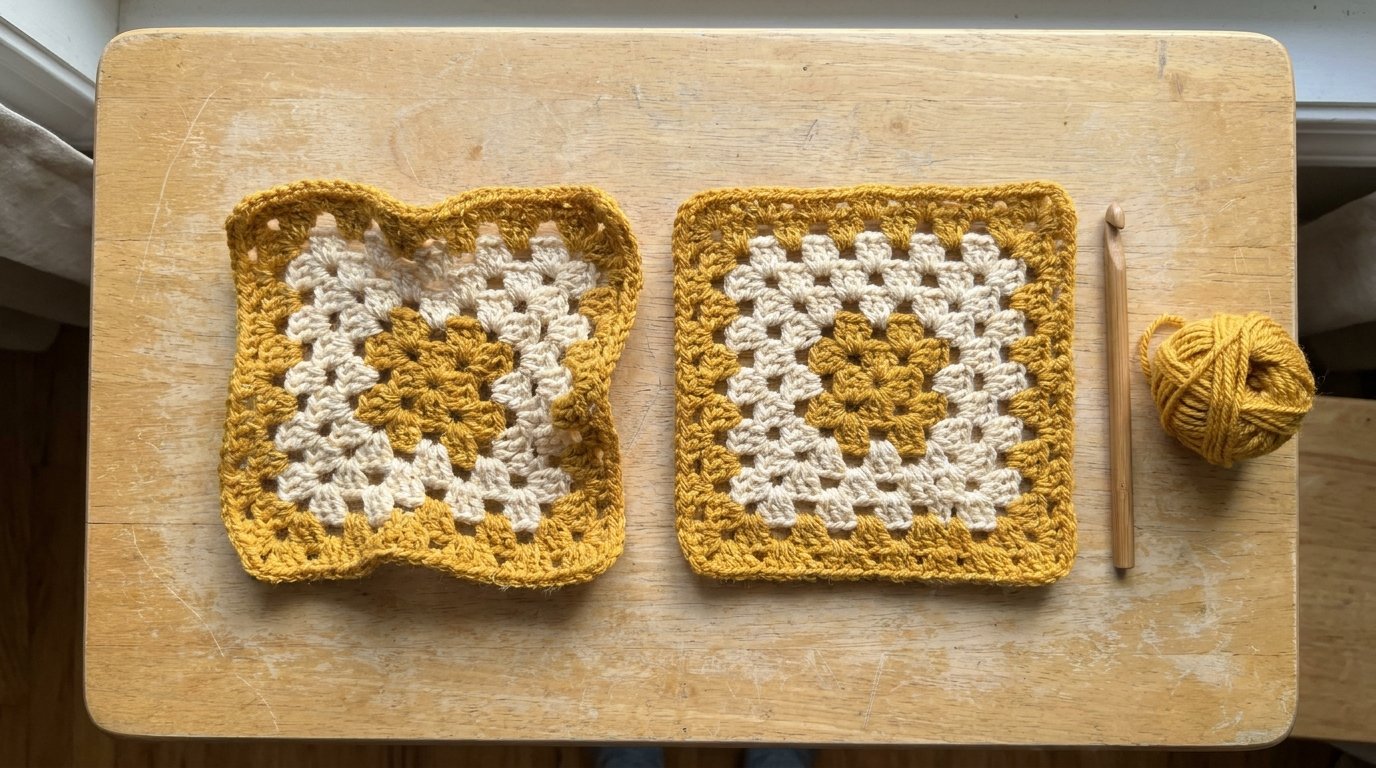
You just finished the last round of a granny square blanket you’ve been working on since September. You lay it out on the floor, step back, and… the corners curl, one side is longer than the other, and the edges ripple like a potato chip. Before you frog it in frustration, try one simple finishing step: blocking.
Blocking is the quiet secret behind every crochet project that looks “store-bought neat.” In this guide you’ll learn how to block crochet the right way for your yarn, whether that’s wool, cotton or acrylic, with step-by-step instructions for wet, spray and steam blocking, the tools you actually need (and cheap swaps), drying times, and the mistakes that ruin a finished piece.
Quick answer: To block crochet, add moisture (and sometimes heat) to your finished piece, shape it to the right measurements, pin it flat and let it dry completely. Wet block natural fibers like wool and cotton by soaking and pinning them. Spray block delicate pieces by pinning first and misting with water. Steam block acrylic by hovering a steamer or iron over the pinned piece without ever touching the yarn.
Key Takeaways
- Blocking relaxes the stitches so your crochet lies flat, hits its measurements and drapes better.
- Match the method to the fiber: wet block wool and cotton, steam block acrylic, spray block delicate or textured pieces.
- Always check the yarn label first. It tells you whether heat or water is safe.
- Let it dry 100% before unpinning, or the edges will spring back.
- You don’t need fancy gear: towels, rust-proof pins, a spray bottle and a measuring tape will do.
Table of Contents
- What Is Blocking in Crochet?
- Is It Necessary to Block Your Crochet?
- What You Need to Block Crochet
- Which Blocking Method Should You Use? (Yarn Chart)
- How to Wet Block Crochet (Step by Step)
- How to Spray Block Crochet
- How to Steam Block Acrylic Crochet
- How to Block Granny Squares
- Does Blocking Make Crochet Bigger or Smaller?
- Common Blocking Mistakes (and Fixes)
- Blocking Your Handmade Gifts Before the Holidays
- FAQ
- Final Thoughts
What Is Blocking in Crochet?
Blocking is a finishing technique where you use water, steam or both to relax the fibers of a finished crochet piece, then set it into its final shape and size as it dries. Think of it like ironing a shirt, except you’re shaping the fabric instead of pressing it.
When you crochet, every stitch is pulled a little differently depending on your tension, your mood and how tired your hands are. Blocking evens all of that out. The yarn loosens up, the stitches settle next to each other, and the piece “remembers” the shape you pinned it into.
Here’s what blocking does for your work:
- Flattens curling edges and rippled borders.
- Squares up corners so motifs and panels are the same size.
- Evens out tension so tight and loose rows look consistent.
- Opens up lace and makes stitch patterns like shells, snowflakes and filet crochet actually readable.
- Softens the fabric and improves drape, especially in shawls, scarves and garments.
- Makes seaming easier because matching pieces line up stitch for stitch.
One quick note on vocabulary: “blocking” as a finishing step is different from the “block stitch” you may see in patterns, which is a textured stitch pattern. This guide is all about the finishing technique.
Is It Necessary to Block Your Crochet?
Not always. Blocking is a tool, not a rule. Here’s a practical way to decide:
Always block
- Lace shawls, doilies and anything with an open stitch pattern.
- Granny squares and motifs you’re going to join into a blanket.
- Garment pieces you need to seam (sweater panels, cardigan fronts).
- Flat ornaments like crochet snowflakes that need crisp points.
- Anything you’re giving as a gift and want to look polished.
Usually optional
- Dense single crochet dishcloths and washcloths (they’ll get wet anyway).
- Chunky blankets that already lie flat.
- Hats and beanies that fit well straight off the hook.
Usually skip
- Amigurumi and stuffed toys. The stuffing gives them their shape.
- Textured 3D pieces like puff stitch or bobble cushions, where blocking flat could crush the texture.
- Pieces made with novelty yarns (eyelash, chenille, faux fur) unless the label says otherwise.
If your project curls while you’re still working on it, blocking will help, but it can’t fully fix a stitch count or tension issue. Our guide on why your crochet is curling walks you through the causes so you can fix them at the source.
What You Need to Block Crochet
You can spend a lot on blocking gear, but you don’t have to. Here’s the basic kit, with budget swaps:
| Tool | What it’s for | Budget swap |
|---|---|---|
| Blocking mats (interlocking foam) | A pinnable surface that won’t mind getting wet | Kids’ foam play mats, a folded towel on a bed, an ironing board for small pieces |
| Rust-proof pins (T-pins or blocking pins) | Holding the piece in shape while it dries | Stainless steel sewing pins (never pins that can rust) |
| Measuring tape or ruler | Hitting the measurements in your pattern | Most mats have a printed grid you can use |
| Spray bottle | Misting for spray blocking | Any clean, empty spray bottle |
| Basin or sink | Soaking for wet blocking | A clean bucket or bathtub |
| Clean towels | Squeezing out water | Light-colored towels, so no dye transfers |
| Steamer or steam iron | Steam blocking acrylic | A handheld garment steamer works well |
| Wool wash (optional) | Gentle cleaning while you soak | A drop of mild, no-rinse wash, or skip it entirely |
| Blocking wires (optional) | Perfectly straight edges on shawls and blankets | Pins placed close together |
Want a blocking kit of your own, or shopping for a crochet friend? Blocking mats and rust-proof pins are on our list of gifts crocheters will actually use.
Which Blocking Method Should You Use? (Yarn Chart)
The single most important rule of blocking: choose the method based on the fiber, and read the yarn label first. If the label shows a crossed-out iron symbol, keep heat away from it. Here’s a general guide:
| Yarn fiber | Best method | Why |
|---|---|---|
| Wool, merino, alpaca (non-superwash) | Wet block or spray block | Animal fibers relax with water and hold the new shape well. |
| Superwash wool | Spray block or gentle wet block | It can grow a lot when soaked, so measure carefully and don’t stretch. |
| Cotton and linen | Wet block or steam block | Plant fibers take water well and can handle some heat. |
| Acrylic | Steam block | Water alone barely changes acrylic; gentle heat relaxes it. |
| Wool or acrylic blends | Spray block first, steam carefully if needed | Test on a swatch, since each blend behaves differently. |
| Mohair, silk, delicate fibers | Spray block | The gentlest option; soaking can mat or weigh down fuzzy fibers. |
Not sure? Spray blocking is the gentlest method for almost any yarn. And if you have a leftover swatch, test on that before risking the real project.
How to Wet Block Crochet (Step by Step)
Wet blocking gives you the most dramatic, longest-lasting results on natural fibers. It’s ideal for wool shawls, cotton blankets, and lace that needs to open up.
Difficulty: Easy | Active time: 15 to 30 minutes | Drying time: usually 1 to 2 days
Step 1: Soak
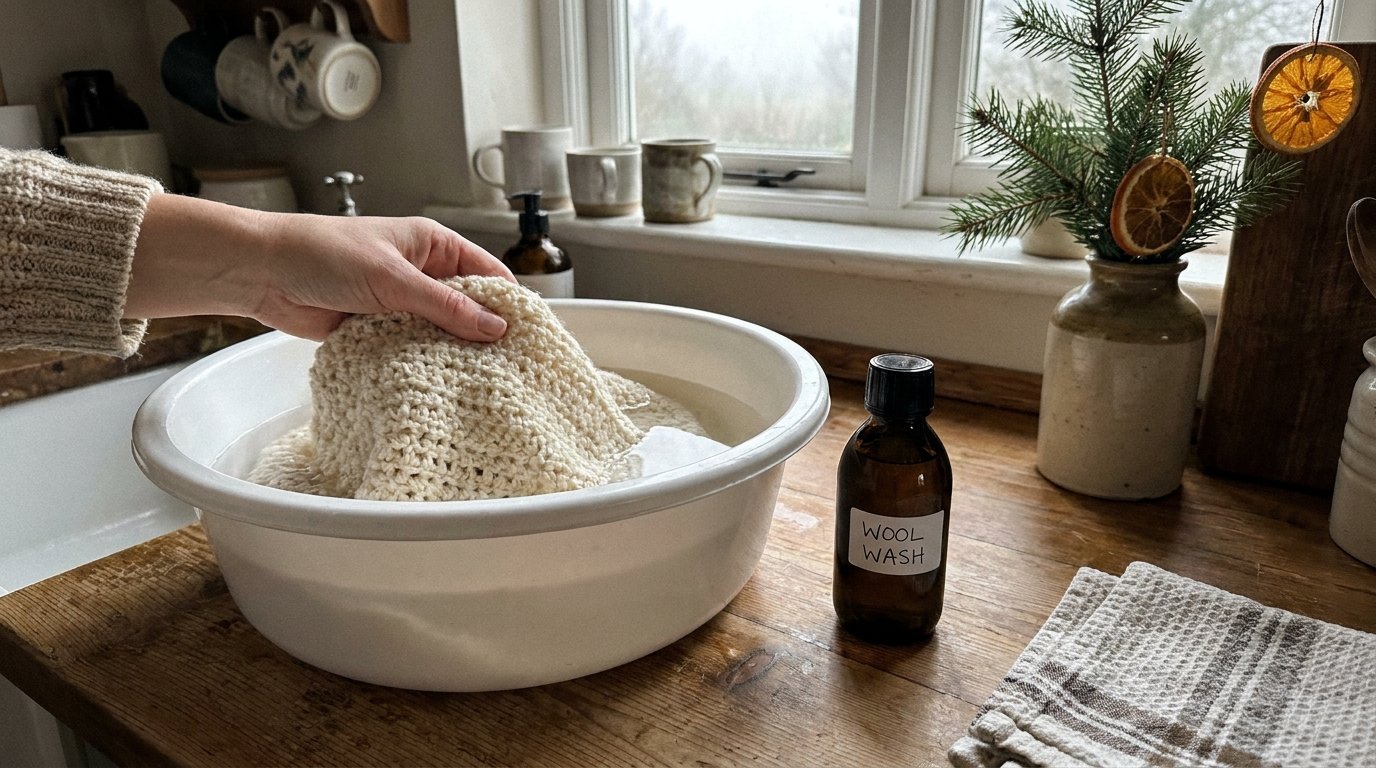
Fill a sink or basin with cool or lukewarm water (not hot, especially for wool, which can felt with heat plus agitation). Add a small amount of wool wash if you like. Submerge your crochet piece and gently press it down until it’s fully soaked. Let it sit for about 15 to 20 minutes so the water gets all the way into the fibers.
Step 2: Drain without wringing
Drain the water and press the piece against the side of the basin to push out excess water. Never wring or twist your crochet; that can stretch the stitches out of shape and, with wool, encourage felting.
Step 3: Roll it in a towel
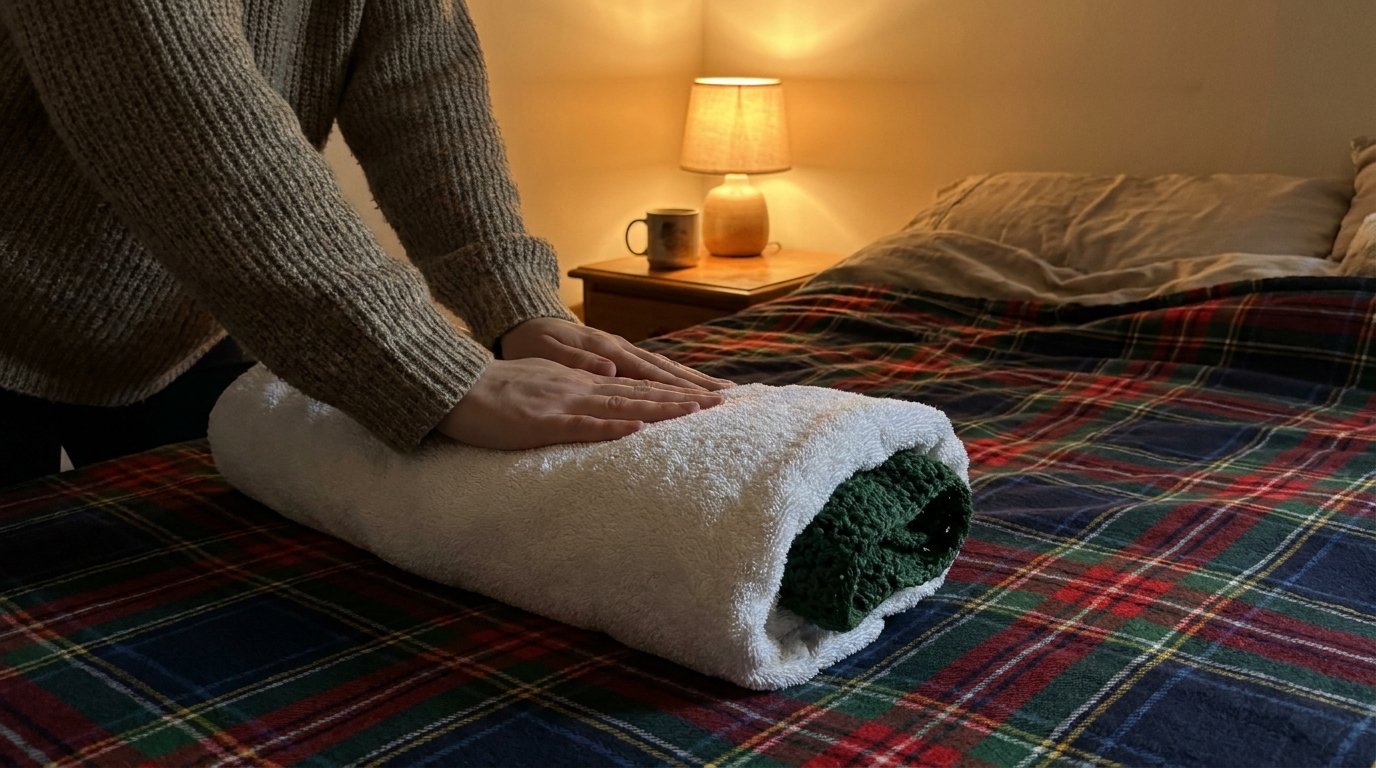
Lay the piece flat on a clean, dry towel. Roll the towel up like a burrito with the crochet inside, then press or kneel on the roll. This squeezes out most of the remaining water. For a big blanket, you may need two towels.
Step 4: Shape and measure
Lay the damp piece on your blocking mats. Gently ease it into shape with your hands: smooth out ripples, straighten the edges, and use your measuring tape to match the measurements in your pattern. Stretch gently. You’re guiding the fabric, not forcing it.
Step 5: Pin it
Pin the corners first, then the midpoints of each side, then fill in between. Keep pins close together (roughly every inch or two) along edges you want straight. For lace or pointed edges, pin out each point. Angle T-pins slightly away from the fabric so they hold better.
Step 6: Let it dry completely
Leave it in a spot with good air flow, away from direct heat and direct sun. A fan in the room speeds things up. Don’t unpin until it’s completely dry, including the underside. If you’re unsure, give it a few more hours.
How to Spray Block Crochet
Spray blocking (also called mist blocking) is the gentle middle ground. You pin the piece dry, then mist it with water. It’s perfect for small items like coasters, ornaments and motifs, for delicate fibers like mohair, and for pieces that just need a light tidy-up.
- Pin first. Lay the dry piece on your mats and pin it to the right shape and measurements.
- Mist evenly. Spray clean water over the whole surface until it’s damp all the way through, not just on top.
- Pat it in. Gently press the damp fabric with your palm to help the water absorb.
- Dry and unpin. Let it dry fully before removing the pins. Smaller pieces may be dry within a few hours.
Spray blocking is a lifesaver for Christmas makes. If you’re crocheting snowflake ornaments, pin each point out and mist them; for extra-stiff snowflakes, many makers use a diluted fabric stiffener instead of plain water.
How to Steam Block Acrylic Crochet
If you’ve ever soaked an acrylic blanket and watched it dry right back into its old shape, you’re not alone. Acrylic is a synthetic fiber, so water alone has very little effect on it. What it does respond to is gentle heat, which is why steam blocking is the go-to method for acrylic.
Steam blocking acrylic also changes the fabric: the stitches relax, the piece drapes and feels softer, and the change is essentially permanent. Crocheters sometimes call heavy steaming “killing” acrylic, because the yarn loses its springiness for good. A light steam is usually all you need.
Steps for steam blocking
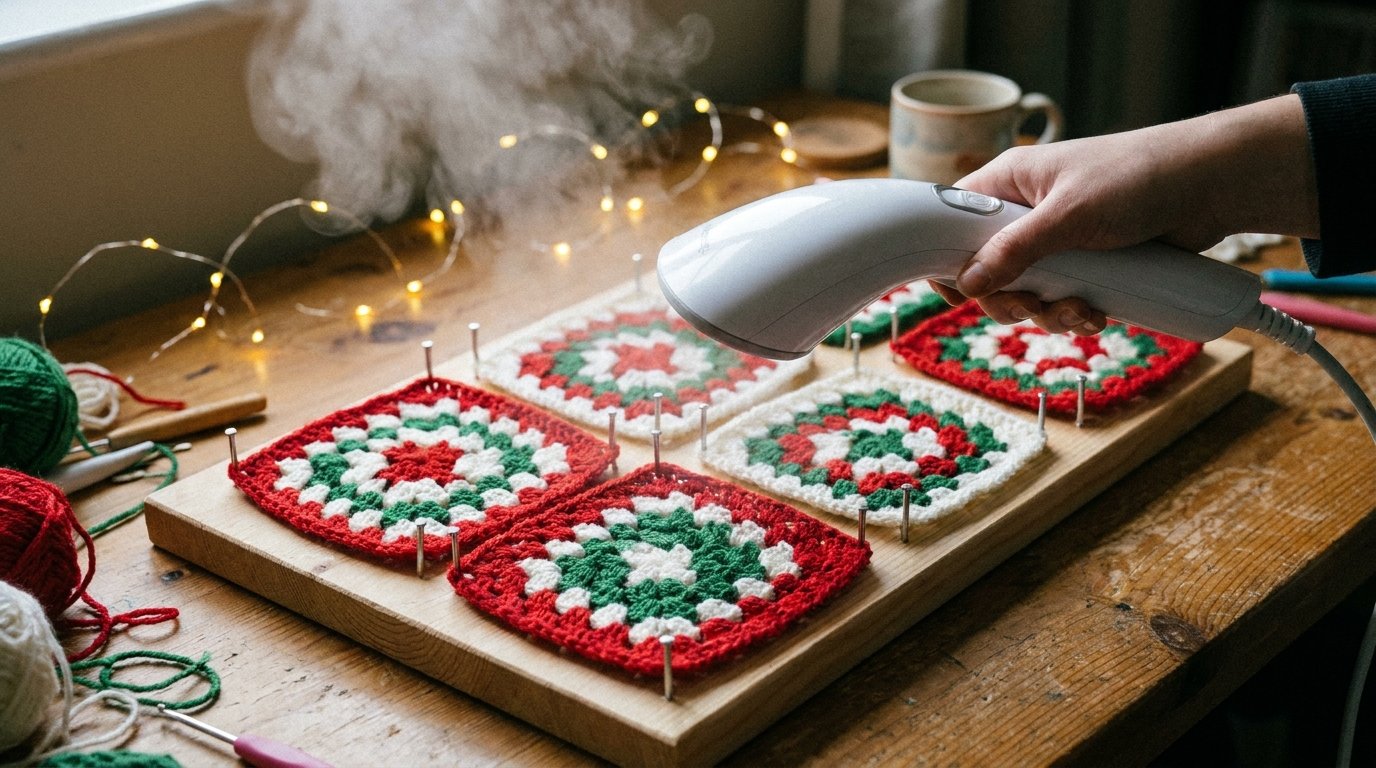
- Pin the dry piece to your mats in the shape and size you want. Use heat-safe metal pins (plastic-headed pins can melt).
- Heat your steamer or iron on its steam setting.
- Hover, never press. Hold the steamer or iron about an inch or two above the fabric and move it slowly so the steam passes through the stitches. Never let a hot iron touch acrylic; it can melt or flatten the yarn permanently.
- Watch it relax. You’ll see the edges flatten and the stitches settle. Stop as soon as the piece looks right. Less is more.
- Let it cool and dry completely while still pinned, then remove the pins.
Safety tip: Steam is hot. Keep your fingers out of the steam path, and keep foam mats a safe distance from the iron’s plate. If you have a wool or cotton blend, test a corner first.
No steamer? Some crocheters use a hair dryer on a warm setting over a lightly misted, pinned piece. It’s slower and less even, but it works for small acrylic items.
How to Block Granny Squares
Granny squares are where blocking really earns its keep. Even experienced crocheters end up with squares that are a little different in size, and blocking them to one measurement makes joining so much easier.
- Block before joining. Squares of the same size join neatly, and the finished blanket lies flat. If you need a refresher on making the squares themselves, see our step-by-step granny square tutorial.
- Use a granny square blocking board (a board with evenly spaced pegs) if you make lots of squares. It lets you stack several squares on the pegs and block them all to the exact same size.
- DIY option: Draw a square of your target size on a piece of paper, slide it under a clear plastic sheet on your mat, and pin each square to the outline.
- Do you have to wet them first? Only for wet blocking. For acrylic squares, pin them dry and steam. For wool or cotton, either soak them or pin and spray.
- Block again after joining if the finished blanket still waves at the seams or edges.
Planning a whole blanket? Our guide to planning a granny square blanket and joining the squares covers layouts and joining methods, and our post on easy crochet blanket borders shows how to finish the edge so it stays straight after blocking.
Does Blocking Make Crochet Bigger or Smaller?
It depends on how you pin it and what the yarn is made of. Blocking lets you gently stretch a piece, so it usually gets a little bigger, especially lace and open stitches, which can grow noticeably once they’re opened up. Dense stitches like single crochet don’t move much.
A few things to keep in mind:
- You can make it bigger more easily than smaller. If a piece is too big, you can pin it slightly smaller while damp, but you can’t shrink stitches much without felting (which is permanent and only works on non-superwash wool).
- Natural fibers can stretch further than acrylic, which tends to stay closer to its original size.
- Superwash wool may grow on its own when wet, so lay it flat and avoid hanging it.
- Swatch first for garments. Block your gauge swatch the same way you’ll block the finished piece, then measure. That way your sweater fits after blocking, not just before.
Common Blocking Mistakes (and Fixes)
- Using hot water on wool. Heat plus agitation can felt it. Stick to cool or lukewarm water and don’t rub.
- Wringing out the water. Twisting stretches stitches. Roll in a towel and press instead.
- Pressing an iron on acrylic. It can melt or flatten the yarn. Always hover.
- Unpinning too early. Slightly damp crochet springs back. Wait until it’s completely dry.
- Too few pins. Wide gaps between pins create scalloped edges. Pin closer on straight sides.
- Rusty pins. They can leave marks on light yarn. Use stainless steel or blocking pins.
- Over-stretching. Pulling too hard distorts the stitch pattern and can make a piece grow out of proportion. Ease it into shape.
- Skipping the label. The care symbols tell you what heat and water your yarn can handle. A quick look saves a ruined project.
- Drying in direct sun. It can fade bright colors. Choose shade and good air flow.
Blocking Your Handmade Gifts Before the Holidays
If you’re crocheting presents this season, blocking is the five-minute step (plus drying time) that makes them look truly finished. Spray block flat ornaments, steam acrylic scarves so they drape nicely, and wet block wool wraps so they’re soft and even. Just plan ahead: a big blanket can take a day or two to dry, so don’t leave it until December 24th.
Need ideas for what to make? Browse our quick crochet gifts you can make in one evening, or find ready-to-make patterns in the Yarvella pattern shop.
FAQ
What is the easiest way to block crochet?
Spray blocking is the easiest. Pin the dry piece to a mat or folded towel in the shape you want, mist it with water until damp all the way through, and let it dry before unpinning. It works on most yarns and needs only pins and a spray bottle.
Is it worth blocking acrylic yarn?
Yes, if you use heat. Soaking acrylic in water does very little, but gentle steam relaxes the fibers, flattens curling edges and improves drape. Hover the steamer or iron above the yarn and never let it touch.
Do I have to block my crochet every time I wash it?
Natural fibers like wool and cotton may need a quick reshape and lay-flat dry after washing, which is basically a light wet block. Acrylic that has been steam blocked usually keeps its relaxed shape, so it rarely needs re-blocking.
Do crochet pieces get bigger after blocking?
They often get a little bigger, because blocking relaxes and opens up the stitches. Lace and open stitch patterns can grow the most. Dense stitches and acrylic yarn change less.
Can I use a hair dryer to block acrylic yarn?
Yes, for small pieces. Pin the item, mist it lightly, and move a hair dryer on a warm setting back and forth above it until it’s dry. A steamer gives more even results on larger projects.
Do I need to wet my granny squares before blocking?
Only if you’re wet blocking natural fibers. For acrylic granny squares, pin them dry and steam them. For wool or cotton, you can either soak them first or pin them dry and spray them.
Can I block crochet without blocking mats?
Yes. A thick towel folded on a bed or carpet, a foam play mat, a yoga mat or an ironing board for small pieces all work. Just use rust-proof pins and make sure the surface can get damp.
How long does blocking take to dry?
Small spray-blocked pieces can dry in a few hours. Wet-blocked shawls and blankets usually take one to two days, depending on the yarn weight, humidity and air flow. Always wait until the piece is fully dry before unpinning.
Final Thoughts
Blocking is the step that turns “I made this” into “wait, you made this?” Once you know which method suits your yarn (wet for wool and cotton, steam for acrylic, spray when in doubt), it takes very little effort for a big jump in how polished your crochet looks.
Start small: block a single granny square or a snowflake ornament tonight and compare it with an unblocked one. You’ll see the difference right away. Then grab your next project, whether it’s a cozy blanket or a stack of holiday gifts, and give it the finish it deserves.
Keep making
How to Crochet a Pumpkin: Easy Free Pattern for Beginners
Learn how to crochet a pumpkin the easy way: a flat ribbed rectangle you roll, stuff and shape. Free beginner pattern in 3…
Read the guide
Knitting vs Crochet: Which Is Easier, Faster and Better for You?
Knitting vs crochet compared: which is easier to learn, faster, uses less yarn, and suits blankets, sweaters and gifts, plus a 20-minute crochet…
Read the guide