
Easy Crochet Blanket Borders: Single Crochet, Crab Stitch and Flat Corners
Easy crochet blanket borders for beginners: a flat single crochet round, a crab stitch (reverse single crochet) edge step by step, and fixes for borders that ripple or curl.
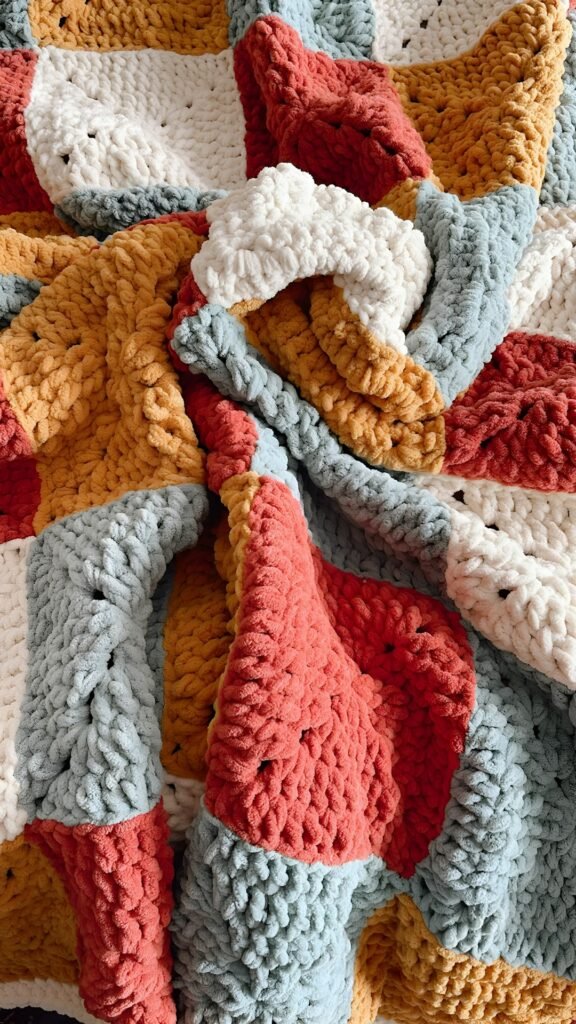
A border can make a blanket feel finished, frame a color scheme, and protect edges that get handled often. It can also turn a comfortable blanket into a stiff or wavy one if the new round has too many stitches, too few stitches, or a very different tension. Start with the fabric you already have, then choose the lightest finish that solves its actual problem.
Quick answer: For a first blanket, one even round of single crochet is a useful foundation. You can stop there for a clean edge or add another simple round once the blanket still lies flat. There is no universal stitch count for every side edge: row height, yarn, hook and tension all change the spacing.
Illustrative photograph: Bogdan Nesterenko via Unsplash. It shows a handmade blanket, not the exact border steps below.
Do you need to edge a crochet blanket?
No. If the final rows and sides already look even, the blanket can be complete without a border. A border is useful when you want to unify several panels, cover a change in color, add a little structure to an open stitch, or make the outline visually consistent. It will not repair a badly uneven stitch count in the body of the blanket. Fix that source problem before adding a decorative finish.
Lay the blanket on a flat surface before deciding. Check all four sides without pulling them into shape. If one edge is substantially shorter than its opposite edge, measure and inspect the rows first. If the fabric is square enough and the edge simply looks unfinished, a border is a reasonable next step.
Which edging stitch should you choose?
Slip stitch: a nearly invisible finish
A slip-stitch round adds little height. It suits a blanket that already has a stable outer edge, but a tight slip-stitch round can pull the fabric inward. Keep the working loop relaxed and test a short section before committing to the full perimeter.
Single crochet: a tidy first border
Single crochet gives a clear outline and is easy to see while you work. It is a good foundation for a second round because you can place the next stitches into a more regular edge. For a beginner, one round in the blanket’s main color often looks more balanced than a thick, high-contrast trim.
Half double crochet: a softer, wider band
Half double crochet adds more depth. It can work well when the blanket needs a visible frame, but test it on a small section after an even foundation round. More height makes extra stitches or tight corners easier to notice. If you are still learning the stitch, see our half double crochet guide first.
How to plan a flat foundation round
Use the same yarn weight as the blanket or a yarn with a similar feel. Begin with a hook size that produces a relaxed edge in your hands. On the top and bottom, you can usually work into the existing stitches. On the sides, you work along row ends, where a fixed rule such as “one stitch in every row” may be too crowded for short rows or too sparse for tall ones.
Mark each corner and then mark a few evenly spaced points along long sides. Work a short trial section along one row-end side. Lay it flat without stretching. If it ruffles outward, reduce how often you place stitches. If it draws the side inward, add placements. The goal is a smooth edge that follows the blanket, not a formula you must force onto it.
At each corner, place enough stitches in the corner space to turn without pulling. Three single crochets in a corner is a common starting point for a single-crochet round, but inspect your own fabric: a rounded or open corner may need a different placement. Recheck after you have worked past the corner, since a corner can look fine in your hand and cup when the blanket lies flat.
A simple beginner border, step by step
1. Weave in loose tails and identify the front and back if the stitch pattern has a preferred face. Mark the corners before joining border yarn.
2. Join the yarn on a straight side rather than at a corner. Work single crochet along the existing edge, pausing every few inches to smooth the fabric on a table.
3. Turn each corner with a small group of stitches in the corner space. Continue along row ends with spacing based on how the edge lies, not an assumed one-size-fits-all count.
4. Before closing the round, lay the entire blanket flat. Adjust any rippled or contracted sections now. Join neatly, fasten off, and weave the tail through several stitches.
5. Stop after that round if the frame looks complete. For a slightly wider border, add a second single-crochet round and inspect the corners again. Do not add rounds only because a pattern shows more of them.
Why does a crochet blanket border ripple or curl?
Ruffling: Too much fabric has been added to the perimeter, often along row ends or corners. Undo the problem section and spread the placements farther apart. Changing to a smaller hook can affect tension, but it does not replace correcting an excessive stitch count.
Cupping or pulling inward: The round may have too few stitches, a hook that produces a tighter fabric, or both. Rework a short section more loosely and add side placements where the fabric needs them. A border should follow the blanket’s natural length.
Wavy corners: An overly generous corner group can flare, especially after several rounds. If the first round was flat and the second is wavy, check the newest corner increases before changing the whole side.
Uneven body: A border cannot make missing rows or a changing blanket width disappear. Compare opposite sides and inspect where the difference began. Our first blanket stitch guide helps you choose a manageable fabric before a larger project.
What are the best crochet border edging styles?
For a plain finish, compare single crochet, slip stitch and half double crochet. For decoration, consider a small picot edging or a shell border once the foundation round lies flat. Match the edging to the blanket: a textured body often needs only a quiet frame, while a simple body can carry a more decorative edge.
Shell and picot edgings need their own repeat and corner instructions. Count each side and plan the corner before starting; do not force a straight-row repeat around every corner. Our shell-stitch guide explains why shell size and spacing change from one pattern to another.
Crab stitch (reverse single crochet) border, step by step
Crab stitch, also called reverse single crochet (rsc), makes a corded, slightly twisted edge that looks like a rope. It is a popular final round because it is sturdy and needs no extra corner shaping. It feels awkward at first because you work backwards.
- Work your flat single crochet foundation round first. Crab stitch goes on top of it.
- Do not turn. Keep the right side facing you. Chain one.
- If you are right-handed, work from left to right (left-handed: right to left). Insert the hook into the next stitch to the right, from front to back.
- Yarn over and pull up a loop, keeping it loose. You have two loops on the hook.
- Yarn over and pull through both loops. That is one crab stitch.
- Repeat into each stitch around. At corners, work one crab stitch into each corner stitch; the twisted cord turns the corner without extra stitches.
- Join to the first stitch with a slip stitch, fasten off and weave in the tail.
If it struggles: loosen the loop you pull up in step 4, or try a hook one size larger for this round only. If the edge flares, skip a stitch now and then; if it pulls in, the loops are too tight.
Frequently asked questions
What is the easiest crochet blanket border?
A single round of single crochet is a practical choice for most beginners. It is visible enough to check for missed placements, yet simple enough to undo and adjust. Try it on a small swatch before edging a full blanket.
Should a border use the same color as the blanket?
Either works. The same color gives a quiet finish and makes minor spacing differences less prominent. A contrasting color emphasizes the outline, so it rewards careful, even placement. Hold both yarn choices against the blanket in daylight before deciding.
Can I add a border to a granny square blanket?
Yes, once the squares are joined and the outer edge is secure. Check the joins and the spaces where four corners meet before beginning the outer round. If you are still planning the layout, start with our granny square blanket planning guide.
The best border is the one that lets the blanket remain comfortable and flat. Work a little, put it down, and look at the fabric. Those short checks will tell you more than a rigid stitch formula.
Keep making

Easy Crochet Christmas Ornaments: 5 Free Beginner Patterns
Make 5 easy crochet Christmas ornaments: a candy cane, bauble, star, mini hat and holly, with free beginner patterns in US terms, tips…
Read the guide
Gifts for Crocheters: 30 Ideas They’ll Actually Use (by Budget)
The best gifts for crocheters, sorted by budget: ergonomic hooks, yarn tools, project bags, stocking stuffers and handmade ideas, plus how to buy…
Read the guide