
Easy Crochet Christmas Ornaments: 5 Free Beginner Patterns
Make 5 easy crochet Christmas ornaments: a candy cane, bauble, star, mini hat and holly, with free beginner patterns in US terms, tips and FAQs.
There is something special about pulling a box of ornaments out every December and finding one you made yourself. Easy crochet Christmas ornaments are the perfect holiday project: they use tiny amounts of yarn, most take less than an hour, and they make sweet little gifts, gift toppers and tree fillers.
In this guide you’ll find five beginner-friendly patterns — a candy cane, a classic bauble, a five-point star, a mini beanie hat and a holly sprig — plus the materials you need, how to hang and stiffen your ornaments, and answers to the questions crocheters ask most this time of year. Every pattern is written in US crochet terms.
Table of Contents
- Why Crochet Christmas Ornaments Are the Perfect Holiday Project
- Materials and Abbreviations
- Pattern 1: Crochet Candy Cane Ornament
- Pattern 2: Classic Crochet Bauble Ornament
- Pattern 3: Five-Point Crochet Star
- Pattern 4: Mini Beanie Hat Ornament
- Pattern 5: Crochet Holly Leaf and Berries
- How to Stiffen and Hang Crochet Ornaments
- Common Mistakes (and Easy Fixes)
- More Easy Crochet Christmas Decoration Ideas
- FAQ
Why Crochet Christmas Ornaments Are the Perfect Holiday Project
If you have ever wondered what to crochet for Christmas when time is short, ornaments are the answer. They are small, so you can finish one during a movie. They are forgiving, because a slightly uneven stitch disappears once the ornament is hanging among lights and branches. And they are a great way to use up leftover yarn from bigger projects.
Ornaments also teach real skills. The bauble below is a mini lesson in amigurumi, the star practices working into a ring, and the mini hat introduces ribbing in the back loop. If you’re brand new, our step-by-step crochet for beginners lesson covers the slip knot, chain and single crochet you’ll need first.
Skill level, time and size at a glance
- Difficulty: Beginner (candy cane, star, mini hat) to advanced beginner (bauble, holly)
- Time: about 15–45 minutes per ornament, depending on the pattern and your speed
- Finished size: roughly 2–6 inches (5–15 cm) with worsted weight yarn
- Yarn needed: small leftovers — a single skein of each color goes a very long way
Materials and Abbreviations
What you’ll need
- Yarn: worsted weight (#4 medium) acrylic or cotton in red, white, green and yellow or gold. Acrylic is soft and inexpensive; cotton gives crisper stitch definition and holds shape well.
- Hooks: 4.0 mm (G-6) for most patterns and 3.5 mm (E-4) for the bauble, so the stuffing doesn’t show through.
- Yarn needle for weaving in ends and sewing.
- Polyester fiberfill (a small handful) for the bauble.
- One chenille stem (pipe cleaner) for the candy cane.
- Stitch marker — a bobby pin or scrap of contrasting yarn works too.
- Scissors, and optionally fabric stiffener or a glue-and-water mix, baker’s twine or thin ribbon for hanging loops, and a small pom-pom maker.
Abbreviations (US terms)
- ch – chain
- sl st – slip stitch
- sc – single crochet
- hdc – half double crochet
- dc – double crochet
- inc – 2 sc in the same stitch
- dec – single crochet 2 together (invisible decrease recommended)
- BLO – back loop only
- MR – magic ring
Following a UK pattern too? Keep our US vs UK crochet abbreviations cheat sheet open in another tab — a UK “double crochet” is a US single crochet, and mixing them up changes the size of every ornament.
Pattern 1: Crochet Candy Cane Ornament
This is the easiest ornament in the set and a lovely first project for a new crocheter. You make a small flat strip, wrap it around a pipe cleaner so it holds its hook shape, then add the classic red spiral.
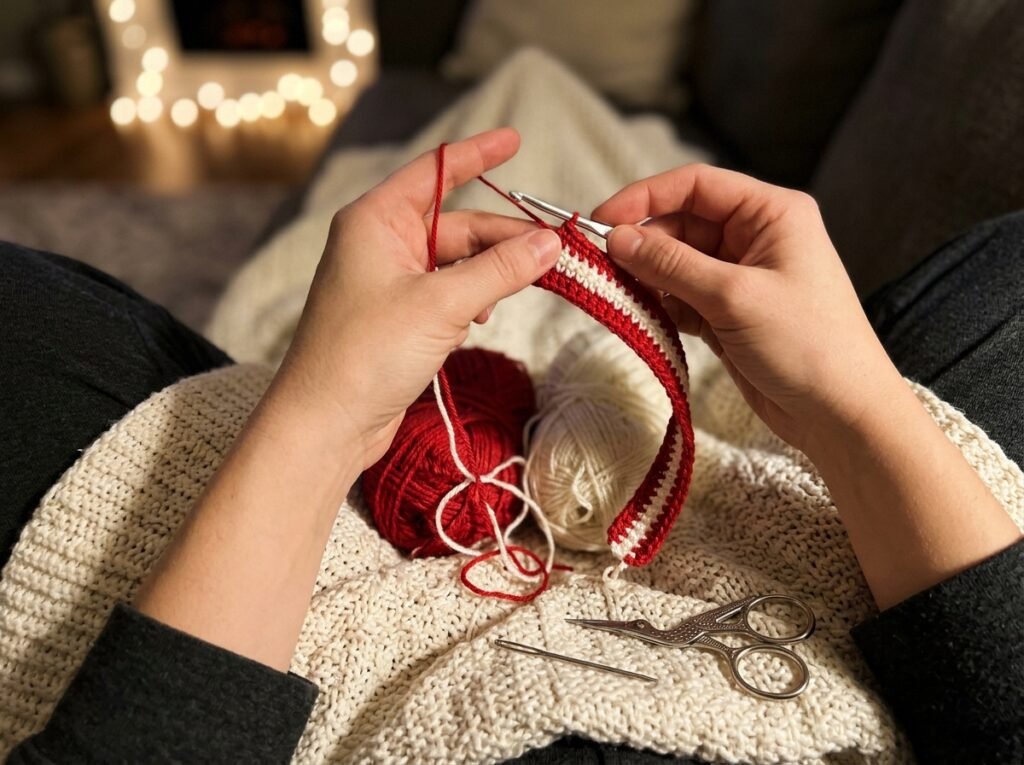
Yarn: white and red worsted weight · Hook: 4.0 mm (G-6) · Size: about 5–6 inches tall · Time: about 20–30 minutes
Instructions
- With white, ch 31.
- Row 1: sc in the 2nd ch from hook and in each ch across. (30 sc)
- Rows 2–3: ch 1, turn, sc in each st across. (30 sc) Fasten off, leaving a tail about 18 inches long for sewing.
- Fold a chenille stem in half and twist it so it is slightly shorter than your strip. Lay it along the center of the strip.
- Fold the strip lengthwise around the stem and whipstitch the long edges together with the white tail. Sew the short ends closed so the wire can’t poke out.
- Cut about 30 inches of red yarn. Secure one end at the bottom of the cane with a couple of small stitches, then wrap the yarn diagonally around the cane, spacing the wraps evenly, until you reach the top. Secure with a few stitches and weave the end inside.
- Bend the top third into a hook. That’s it — the hook itself can sit right on a branch, so no hanging loop is needed.
Tip: For a chunkier cane, add Row 4 in red before folding. You’ll get a thicker cane with a red stripe running along the seam side.
Pattern 2: Classic Crochet Bauble Ornament
A round bauble is the crochet version of a glass ball ornament — but shatterproof, which makes it perfect for homes with kids or pets. It’s worked in continuous spiral rounds, the same way most amigurumi is made. If spiral rounds are new to you, the amigurumi for beginners guide walks through the magic ring and invisible decrease in detail.
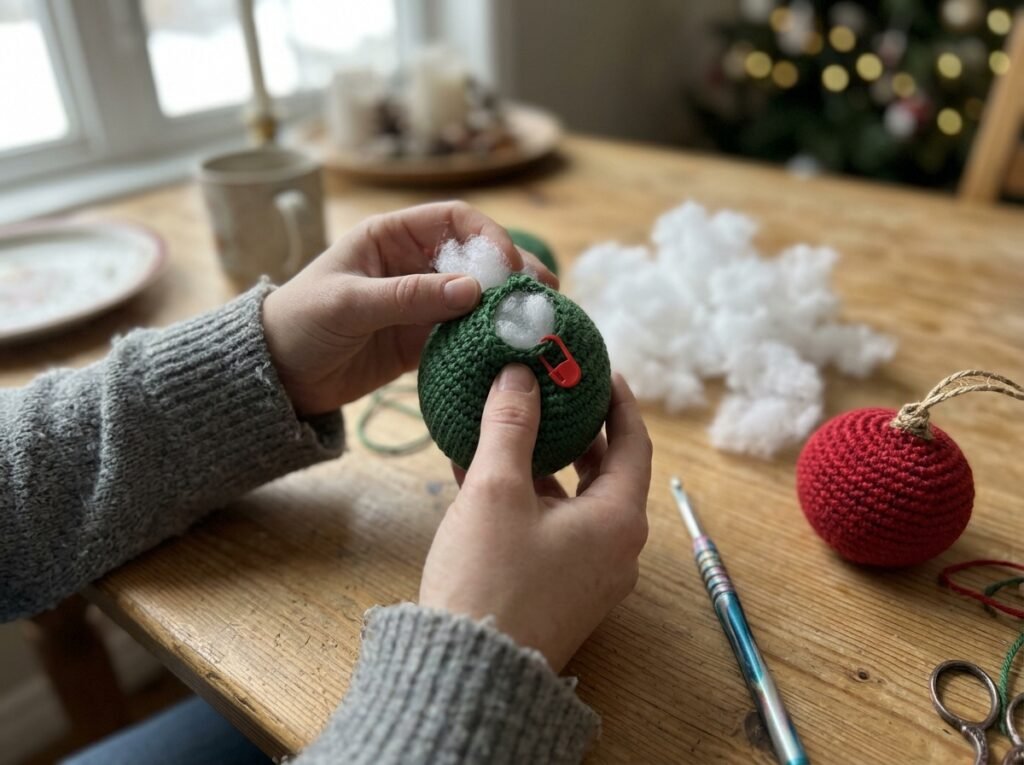
Yarn: any color worsted weight, plus a contrast for an optional stripe · Hook: 3.5 mm (E-4) · Size: about 2 inches across · Time: about 30–45 minutes
Instructions
Work in continuous rounds. Do not join; place a stitch marker in the first stitch of each round and move it up as you go.
- Round 1: 6 sc in a MR. (6)
- Round 2: inc in each st around. (12)
- Round 3: *sc 1, inc* 6 times. (18)
- Round 4: *sc 2, inc* 6 times. (24)
- Rounds 5–9: sc in each st around. (24) For a striped bauble, change color at the start of Round 7, and change back at the start of Round 8.
- Round 10: *sc 2, dec* 6 times. (18)
- Round 11: *sc 1, dec* 6 times. (12) Stuff firmly now — a well-stuffed ball looks rounder and smoother.
- Round 12: dec 6 times. (6) Fasten off, leaving a tail.
- Thread the tail on a needle, weave it through the front loops of the last 6 stitches, and pull tight to close. Bring the needle out at the top center.
- Hanging loop: with a contrasting yarn or twine, ch 15, then sew both ends securely to the top of the ball. Alternatively, thread a ribbon through the top with your yarn needle and knot it.
Tip: Crochet the bauble a little tighter than usual. The smaller 3.5 mm hook keeps the fabric dense so white fiberfill doesn’t peek through the gaps.
Pattern 3: Five-Point Crochet Star
This quick star is made in just two rounds. Use golden yellow for a tree topper look, or white for a snowy, Scandinavian feel. It pairs beautifully with our easy crochet snowflake ornaments if you want a whole set of flat ornaments.
Yarn: yellow, gold or white worsted weight · Hook: 4.0 mm (G-6) · Size: about 3 inches across · Time: about 10–15 minutes
Instructions
- Round 1: make a MR, ch 1, work 10 sc into the ring. Pull the ring closed and sl st to the first sc to join. (10 sc)
- Round 2 (points): *ch 5, sl st in the 2nd ch from hook, sc in the next ch, hdc in the next ch, dc in the last ch, skip the next sc of Round 1, sl st in the following sc.* Repeat from * to * 4 more times. (5 points)
- Fasten off and weave in the ends. Gently pull each point outward to shape it.
- Attach a 6-inch yarn loop to the top point for hanging.
Tip: Flat ornaments like this star look their best when blocked or lightly stiffened (see the finishing section below), which keeps the points sharp.
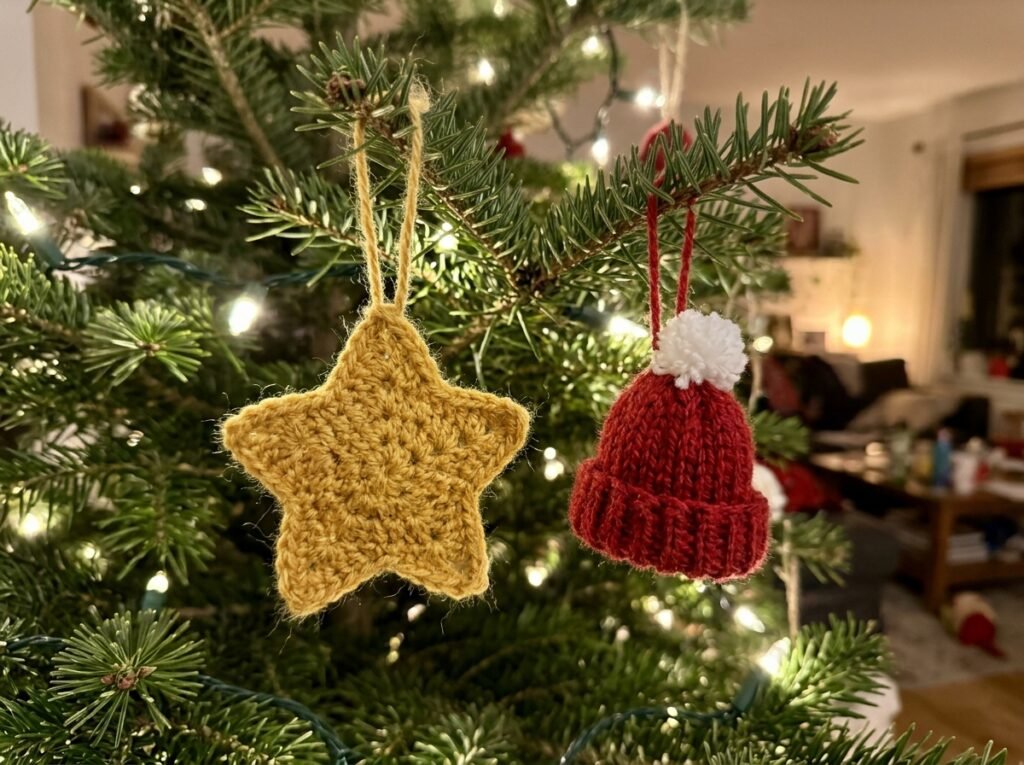
Pattern 4: Mini Beanie Hat Ornament
A tiny beanie with a pom-pom is one of the cutest crochet Christmas ornaments you can make, and it’s a fun way to use up leftover hat yarn. It’s worked flat in back-loop ribbing, then seamed and gathered — no increasing or rounds required. If you love it, you can size it up with our 1-hour easy crochet hat pattern.
Yarn: red (or any color) and white worsted weight · Hook: 4.0 mm (G-6) · Size: about 2.5–3 inches tall · Time: about 30 minutes
Instructions
- With red, ch 11.
- Row 1: sc in the 2nd ch from hook and in each ch across. (10 sc)
- Rows 2–24: ch 1, turn, sc in the BLO of each st across. (10 sc) You’ll see neat vertical ridges forming — that’s your ribbing.
- Fold the piece so Row 1 meets Row 24, and sew or sl st the two edges together to make a tube.
- Thread a yarn needle with a tail and weave it in and out along one open edge of the tube. Pull tight to gather the top of the hat closed, then knot securely on the inside.
- Turn right side out and fold the bottom edge up about ½ inch to form the brim.
- Make a small white pom-pom (wrap yarn around two fingers about 40 times, tie tightly in the middle, cut the loops and trim). Tie it to the top of the hat, then use the pom-pom ties to make a hanging loop.
Tip: Count your rows rather than measuring — ribbing stretches, so 24 rows gives a consistent size even if your tension varies.
Pattern 5: Crochet Holly Leaf and Berries
Holly is a classic for gift toppers, garlands and wreath accents. Make two leaves and three berries per sprig. It’s a good companion to our easy crochet Christmas wreath if you want to decorate the front door too.
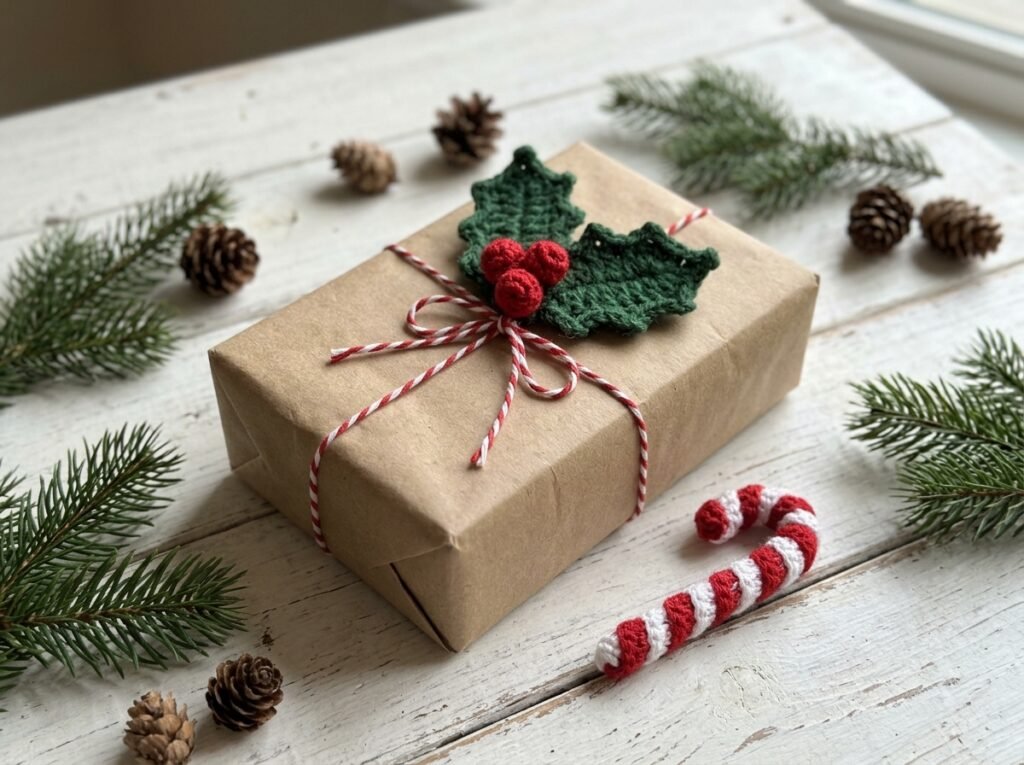
Yarn: green and red worsted weight · Hook: 4.0 mm (G-6) · Size: leaf about 3 inches long · Time: about 20 minutes per sprig
Holly leaf (make 2)
Picot: ch 3, sl st in the 3rd ch from hook.
- With green, ch 10.
- First side: starting in the 2nd ch from hook, work: sl st, sc, hdc, dc, picot, dc, dc, picot, hdc, sc. You are now at the last chain.
- Tip: work (sc, ch 2, sc) in the last ch.
- Second side: rotate the piece and work along the other side of the foundation chain: sc, hdc, dc, picot, dc, dc, picot, hdc, sc, then sl st in the same ch as the very first sl st.
- Fasten off, leaving a tail for sewing.
Berries (make 3)
- With red, make a MR, ch 1, work 8 sc into the ring. Pull the ring very tight and sl st to the first sc.
- Fasten off, leaving a 6-inch tail. Weave the tail through the outer edge of the stitches, tuck the starting tail inside, and pull to cinch into a little ball.
Assembly
Overlap the base of the two leaves in a V shape and stitch them together. Sew the three berries over the join. Add a yarn loop at the back for hanging, or tie the sprig straight onto a gift with twine.
How to Stiffen and Hang Crochet Ornaments
Do crochet ornaments need to be stiffened?
Not always. Stuffed shapes like the bauble and the pipe-cleaner candy cane hold their shape on their own. Flat pieces — stars, snowflakes and holly leaves — can curl or droop after a season on the tree, so a light stiffening helps them stay crisp.
How to stiffen crochet ornaments
- Choose a stiffener: a store-bought fabric stiffener is the easiest option. A common homemade alternative is white school glue thinned with water — start with roughly equal parts and adjust until it’s milky and spreadable.
- Soak: dip the ornament, then squeeze out the excess so the holes and picots don’t fill in.
- Shape: pin it flat on a piece of foam board or a cardboard box covered in plastic wrap. Pull each point into position and pin it.
- Dry: leave it to dry completely, usually overnight, before removing the pins.
If you prefer not to use stiffener, wet-block flat ornaments instead: mist them with water, pin to shape and let them dry. They’ll be softer, but much flatter and neater than unblocked pieces.
Hanging options
- Chain loop: ch 12–15 and sew both ends to the top of the ornament.
- Twine or ribbon: thread it through the top stitches with a yarn needle and knot.
- Built-in hook: the candy cane hangs right on a branch with no extra loop.
- Metal ornament hooks slide easily through crochet stitches if you want a classic look.
Common Mistakes (and Easy Fixes)
- Stuffing shows through the bauble. Go down a hook size or crochet tighter. Choosing fiberfill close to the yarn color also helps.
- The star points are floppy. Make sure you skip one sc between points — if you skip none, you’ll get ten crowded points instead of five sharp ones. Then stiffen or block.
- Your bauble turns out lumpy or pointed. Stack the increases neatly and use the invisible decrease. Stuff a little at a time and shape the ball with your fingers as you go.
- The mini hat is the wrong size. Count rows instead of measuring the stretchy ribbing, and keep your turning chain from adding extra stitches.
- Losing count in spiral rounds. Use a stitch marker in the first stitch of every round. It saves more frogging than any other habit.
- Loose ends working free. Ornaments get handled a lot. Weave each end in at least three different directions before trimming.
More Easy Crochet Christmas Decoration Ideas
Once you’ve made a handful of ornaments, it’s easy to keep going. A few favorite next steps:
- Mini trees: try our crochet Christmas tree pattern, which works as both an ornament and a shelf decoration.
- Stockings: a beginner crochet Christmas stocking can be scaled down with lighter yarn and a smaller hook for a tiny ornament version.
- Gnomes: the easy crochet gnome is a crowd-pleaser on mantels and tiered trays.
- Garland: string baubles, stars and holly sprigs onto a long chain of yarn for a matching garland.
- Gift add-ons: tie an ornament to every present this year — it’s a gift and a gift topper in one. For more ideas, see our quick crochet gifts you can make in one evening.
Looking for something more detailed for your holiday makes? Browse the printable patterns in the Yarvella Crochet pattern store.
FAQ: Easy Crochet Christmas Ornaments
What are some good things to crochet for Christmas?
Small, quick projects work best during the busy season: ornaments, mini stockings, coasters, gnomes, hats, scarves and gift toppers. Ornaments are the fastest win because each one takes about an hour or less and uses only leftover yarn.
What yarn is best for crochet Christmas ornaments?
Worsted weight (#4) acrylic is the most beginner-friendly choice — it’s soft, affordable and comes in every holiday color. Cotton yarn gives sharper stitch definition and holds its shape well, which is great for stars and holly. For delicate, lace-style ornaments, crochet thread is the traditional choice.
How long does it take to crochet a Christmas ornament?
Most simple ornaments take about 15–45 minutes. The star in this guide is one of the quickest, while stuffed shapes like the bauble take a little longer because of the rounds, stuffing and closing.
How do you make crochet ornaments stiff?
Soak the finished ornament in fabric stiffener or a thinned white glue mixture, squeeze out the excess, pin it to shape on a protected surface and let it dry completely. For a softer finish, wet-block it with water instead.
What are some easy crochet Christmas decoration ideas for beginners?
Start with flat or simple shapes: candy canes, stars, snowflakes, mini trees and holly leaves. Then try a small stuffed bauble, a mini hat ornament or a garland made from your favorite motifs.
Can you crochet ornaments without stuffing?
Yes. The candy cane, star, mini hat and holly in this guide need no stuffing at all. If you’d like a round ornament without fiberfill, you can crochet a cover over a plastic or shatterproof ball ornament instead.
How many ornaments can you make from one skein of yarn?
It depends on the skein size and the pattern, but small ornaments use very little yarn, so a standard skein of worsted weight yarn is usually enough for a whole tree’s worth of stars, canes or holly leaves.
Final Thoughts
Easy crochet Christmas ornaments are one of the most rewarding holiday makes: quick enough to finish in an evening, small enough to use up scraps, and meaningful enough to keep for years. Start with the candy cane or star if you’re new, move on to the bauble when you’re ready for amigurumi, and before long you’ll have a handmade set for your own tree — and plenty to give away.
Which ornament will you make first? Pin this guide so you can find the patterns again when it’s time to decorate.
Keep making
Gifts for Crocheters: 30 Ideas They’ll Actually Use (by Budget)
The best gifts for crocheters, sorted by budget: ergonomic hooks, yarn tools, project bags, stocking stuffers and handmade ideas, plus how to buy…
Read the guide
Crochet Christmas Wreath: Easy Free Pattern for Your Front Door
Free crochet Christmas wreath pattern for beginners: a 12-inch door wreath with holly leaves, berries and a bow, plus a quick mini wreath…
Read the guide