
Crochet Gnome Pattern: Easy Free Christmas Gnome for Beginners
Free crochet gnome pattern for beginners: a 6-inch Christmas gnome in one piece, with supplies, step-by-step rounds, beard methods and a mini ornament.
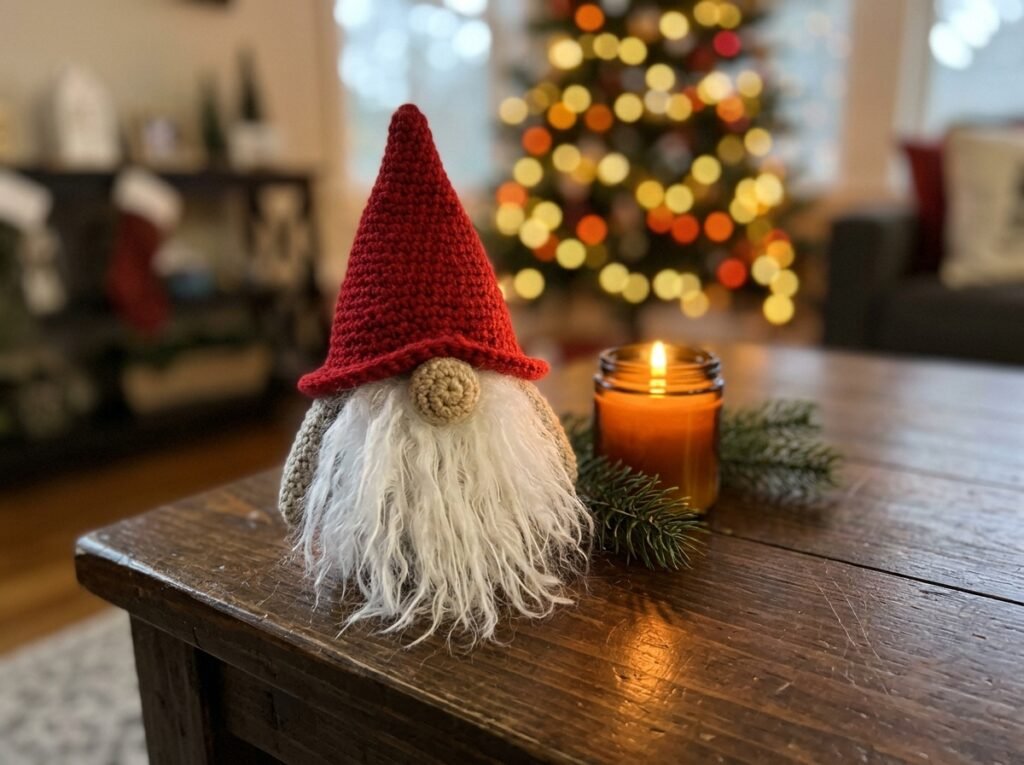
Every December, the same little guy shows up on mantels, shelves and Christmas trees: a round-bellied gnome with a tall hat, a button nose and a beard so big you can’t see his face. He’s charming, he’s quick to make, and the best part is that a crochet gnome pattern is one of the friendliest projects you can pick if you’re still building your confidence with amigurumi.
This guide gives you a complete free pattern for a 6-inch Christmas gnome worked in one piece, plus everything around it: the exact supplies, two beard methods (no glue needed), how to make a mini ornament version, how to keep him standing up straight, and fixes for the mistakes almost everyone makes on their first gnome. Grab a mug of something warm and let’s make one tonight.
What’s in this guide
- Pattern at a glance
- Supplies: yarn, hook and extras
- Stitches and abbreviations (US terms)
- Free crochet gnome pattern: step by step
- How to make a crochet gnome beard
- Mini gnome ornament version
- Easy variations: Santa, fall and Nordic gnomes
- Common mistakes and how to fix them
- FAQ
Crochet gnome pattern at a glance
- Finished size: about 6 inches tall (hat tip included) and 3 inches wide at the base
- Skill level: easy / advanced beginner
- Time: about 2 to 3 hours for your first one, closer to 90 minutes once you know the steps
- Construction: body and hat worked in one piece in continuous rounds, then nose and beard added
- Terms: US crochet terms throughout
If you have never crocheted in the round before, read our amigurumi for beginners guide first. It walks through the magic ring, stitch markers and invisible decreases with a simple snowman, and every one of those skills shows up again here.
Supplies: what you need to crochet a gnome
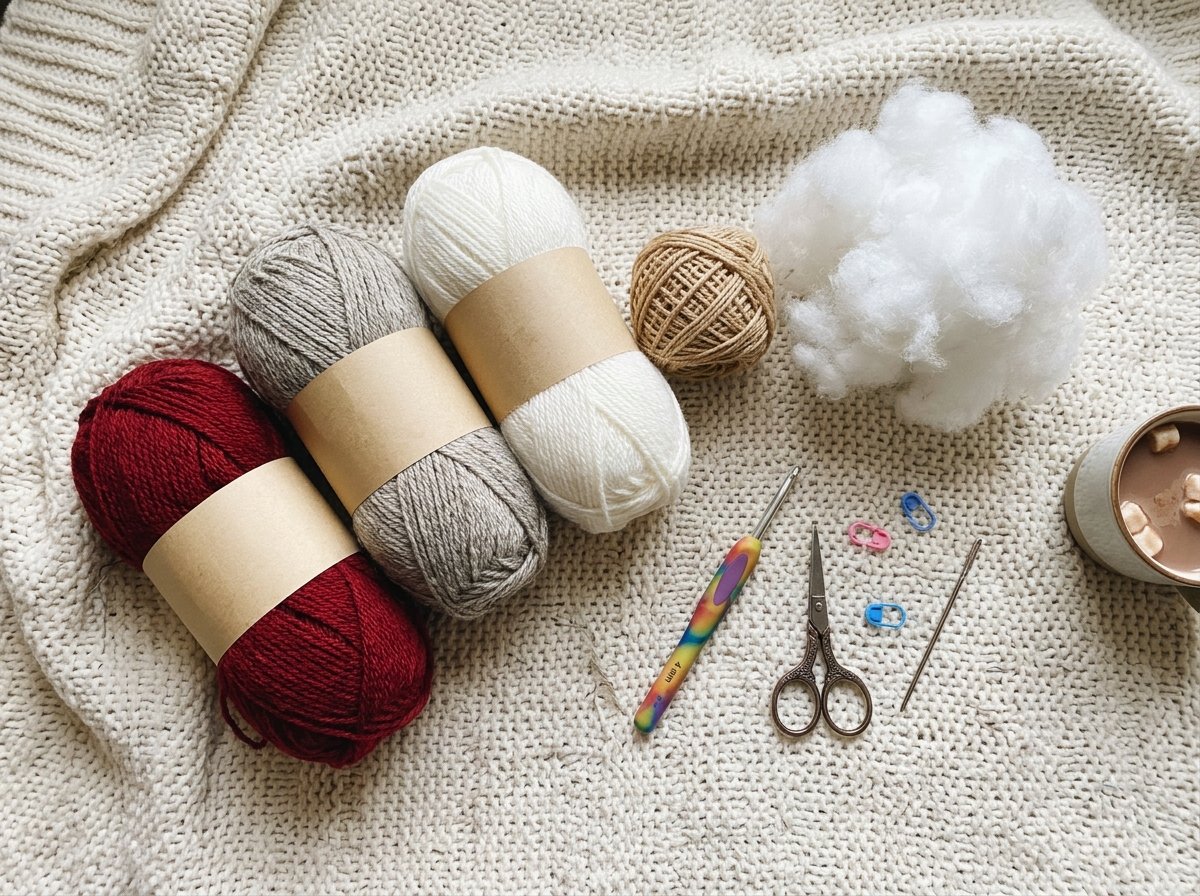
Yarn
- Body color: worsted weight (#4) acrylic or cotton in gray, oatmeal or cream, about 25 yards
- Hat color: worsted weight (#4) in red (or any color you like), about 20 yards
- Nose color: worsted weight (#4) in tan, peach or light brown, about 3 yards
- Beard: about 15 to 20 yards of white or light gray yarn. Plain acrylic works for a brushed beard; a fluffy yarn (brushed acrylic, mohair blend or faux fur) gives a softer, fuller look
Yardages are generous estimates so you don’t run short. Scraps from other projects are perfect here.
Hook and notions
- 4.0 mm (G-6) crochet hook. Go down to 3.5 mm (E-4) if you crochet loosely; tight stitches keep stuffing from peeking through
- Polyester fiberfill stuffing
- Optional: a small handful of poly pellets or a smooth flat stone in a scrap of fabric or a sandwich bag, to weight the base
- Stitch marker (a scrap of contrasting yarn works too)
- Tapestry needle and scissors
- Optional: a pet slicker brush or stiff hairbrush for brushing out the beard
Stitches and abbreviations (US terms)
- MR – magic ring
- ch – chain
- sl st – slip stitch
- sc – single crochet
- inc – increase: 2 sc in the same stitch
- dec – decrease: single crochet 2 together (an invisible decrease through front loops is neatest)
- BLO / FLO – back loop only / front loop only
- (…) x6 – repeat what’s inside the brackets the number of times shown
- (24) – the stitch count at the end of the round
Need a refresher on any of these? Keep our crochet abbreviations cheat sheet open in another tab. It also shows the UK equivalents, which helps if you ever pick up a British gnome pattern.
Free crochet gnome pattern: step by step
Work in continuous rounds without joining. Place your stitch marker in the first stitch of each round and move it up as you go. Counting stitches at the end of every round is the single best habit for a gnome that comes out symmetrical.
Step 1: The base and body (body color)
R1: 6 sc in MR (6)
R2: inc in each st around (12)
R3: (sc, inc) x6 (18)
R4: (2 sc, inc) x6 (24)
R5: (3 sc, inc) x6 (30)
R6: sc BLO in each st around (30). This round creates a crisp edge so your gnome has a flat bottom and stands up on his own.
R7–R14: sc in each st around (30) – 8 rounds
R15: (3 sc, dec) x6 (24)
R16–R17: sc in each st around (24)
At the end of R17, change to the hat color on the last yarn over of the final stitch so the color line is clean.
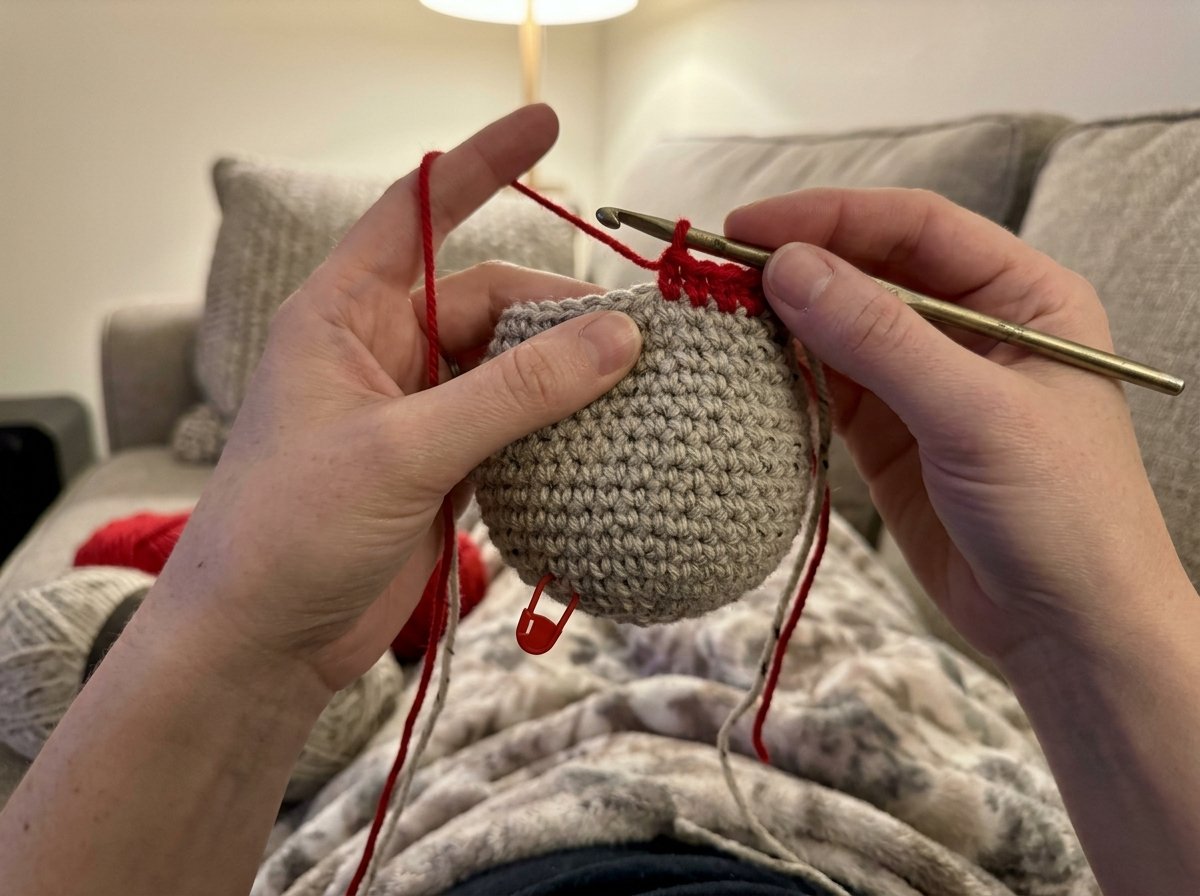
Step 2: Weight and stuff the body
Now is the time to weight the base. Drop your bag of pellets or wrapped stone into the bottom, then stuff the rest of the body firmly with fiberfill. Firm stuffing is what gives your gnome that round, plump belly. If you skip the weight, he’ll still stand thanks to the flat base, but a little weight stops him from tipping over when the cat walks by.
Step 3: The hat (hat color)
R18: sc BLO in each st around (24). Working in the back loops leaves a ring of front loops behind, which you’ll use for the hat brim later.
R19–R21: sc in each st around (24)
R22: (4 sc, dec) x4 (20)
R23–R24: sc in each st around (20)
R25: (3 sc, dec) x4 (16)
R26–R27: sc in each st around (16)
R28: (2 sc, dec) x4 (12)
R29–R30: sc in each st around (12)
R31: (sc, dec) x4 (8)
R32–R33: sc in each st around (8)
R34: dec x4 (4)
R35–R36: sc in each st around (4)
Add a little stuffing to the hat every few rounds, more at the bottom and less toward the tip, so the cone holds its shape but can still bend. Fasten off, weave the tail through the front loops of the last 4 stitches, pull tight and hide the end inside the hat.
Tip: want a floppy, bent hat tip? Stop stuffing after R30, then put one small stitch through the tip and tack it down to the side of the hat.
Step 4: The hat brim
Turn the gnome upside down so you can see the ring of unused front loops from R17. Join the hat color with a sl st in any front loop, ch 1, then sc in each front loop around (24). Sl st to the first sc to join and fasten off. For a chunkier, folded-look brim, work hdc instead of sc.
Step 5: The nose (nose color)
R1: 6 sc in MR (6)
R2: (sc, inc) x3 (9)
R3–R4: sc in each st around (9)
Fasten off with a long tail. Stuff the nose lightly so it’s round, not hard. Sew it to the front of the gnome, centered right under the brim. The nose should touch the brim; that’s what makes it look like the hat is pulled down over his eyes.
How to make a crochet gnome beard (no glue)
The beard is where your gnome gets his personality. Both methods below are attached with stitches, so nothing will come loose in the wash or in a toddler’s hands.
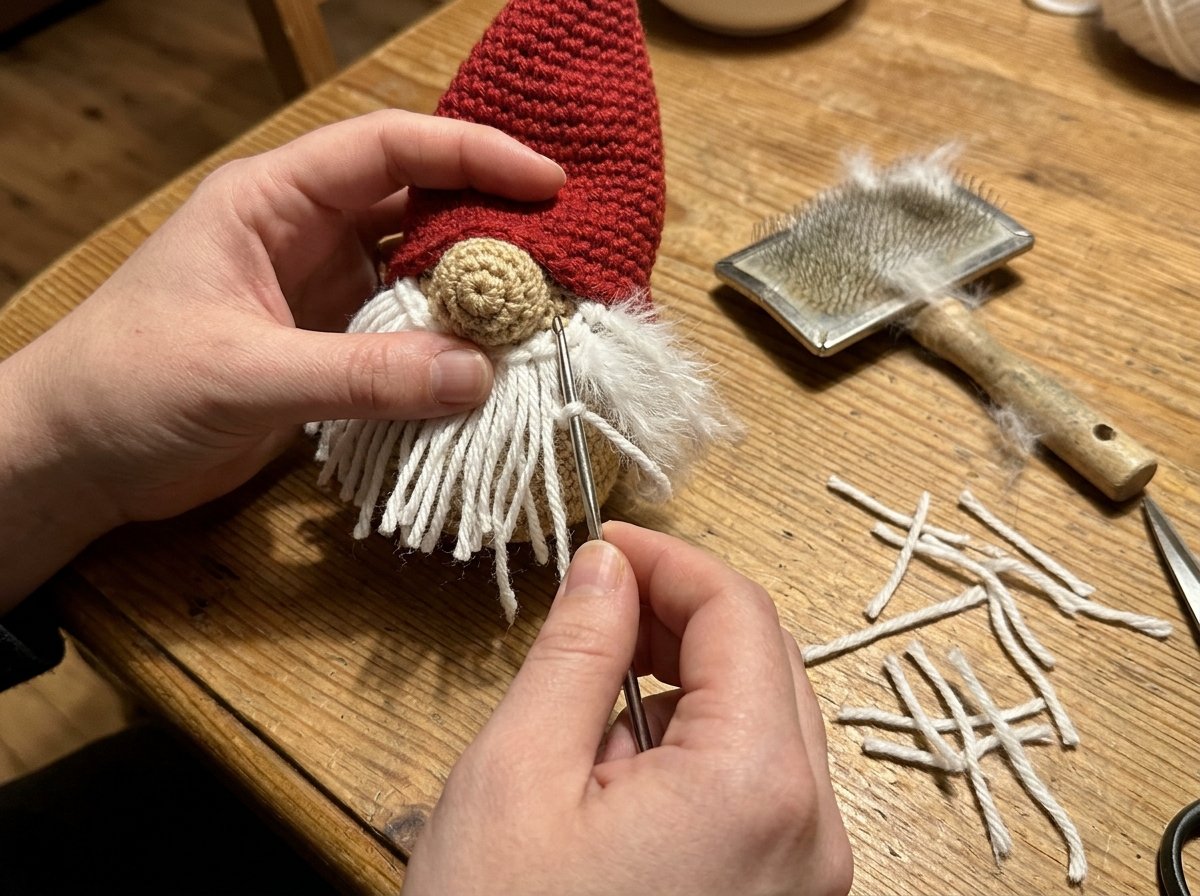
Method 1: Fringe beard (easiest, fluffiest)
- Cut 30 to 40 strands of beard yarn about 4 inches long. Wrapping the yarn around a 2-inch piece of cardboard and cutting along one edge gives you strands that are all the same length.
- Picture a rounded triangle or U shape that starts on both sides of the nose and dips down the belly, about 5 or 6 rounds deep.
- Insert your hook under one stitch inside that shape, fold a strand in half, pull the loop through, then pull both ends through the loop and tug snug. This is a lark’s head knot, the same way you’d add fringe to a scarf.
- Fill the shape row by row, working closest to the nose first so the beard is fullest at the top.
- Brush the strands out gently with a pet slicker brush until they puff up and blend together. Acrylic and wool fluff up beautifully; cotton stays more stringy.
- Trim the beard into a soft point or a rounded shape. Trim a little at a time; you can always cut more.
Method 2: Crocheted loop beard (tidy, no brushing)
Ch 9 in beard color. Row 1: sc in the 2nd ch from hook and across (8), ch 1, turn. Row 2: loop stitch across (8), ch 1, turn. Row 3: sc across (8), ch 1, turn. Repeat Rows 2 and 3, decreasing 1 stitch at each end on every sc row, until 2 stitches remain. Fasten off and sew the straight edge under the nose. You get a neat, curly beard that won’t shed, which is a great choice for gnomes given to small children.
Mini crochet gnome ornament version
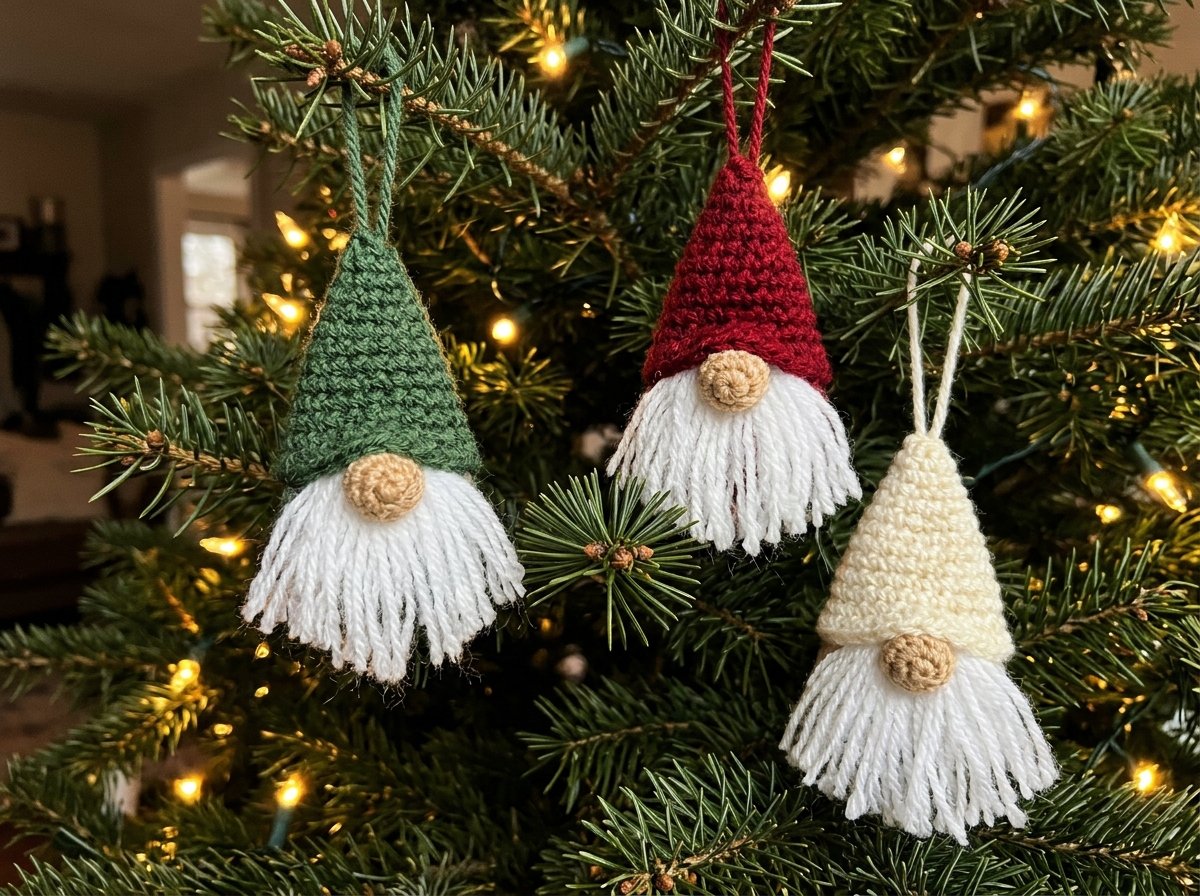
Gnome ornaments make the cutest gift toppers and tree decorations. To shrink the pattern, you have two easy options:
- Smaller yarn: use DK or sport weight (#3) yarn with a 3.0 mm hook and follow the same pattern. Your gnome will finish around 4 to 4½ inches tall.
- Fewer rounds: stay with worsted yarn but stop the base increases at R4 (24 stitches). Work one round of sc BLO (24), then 5 plain rounds of 24 sc for the body. Change to the hat color and continue from R18, leaving out R19–R21.
To add a hanging loop, chain 15 in hat color, fold it into a loop and sew both ends to the tip of the hat before you close it. A bit of gold thread or baker’s twine looks lovely too. If you’re filling the whole tree, pair your gnomes with our 3-round crochet snowflake ornaments and a few mini crochet Christmas trees.
Easy variations: Santa, fall and Nordic gnomes
Once you’ve made one gnome, you’ll want a whole family. These changes take only a few minutes each:
- Santa gnome: red hat, white brim worked in hdc with a fluffy yarn, and a tiny white pom-pom sewn to the tip.
- Nordic gnome: gray or cream hat, a long white beard that reaches the base, and a small knotted scarf in red.
- Fall gnome: rust, mustard or olive hat, brown body, and a felt or crocheted leaf stitched to the brim. Perfect for Thanksgiving tables.
- Striped hat: alternate two colors every 2 rounds from R18 upward. Carry the unused color up the inside.
- Gnome with feet: make two small balls (6 sc in MR, inc around, 2 rounds of 12 sc, dec closed) in brown and sew them under the front edge of the base so they peek out.
- Heart gnome: stitch a small crocheted heart to the beard for a Valentine’s Day version.
Gnomes also make some of the best last-minute gifts. If you’re building a handmade gift list, our quick crochet gifts you can make in one evening has 12 more ideas, and you’ll find ready-to-print PDF patterns in the Yarvella pattern shop.
Common crochet gnome mistakes (and how to fix them)
Stuffing shows between the stitches
Your stitches are too loose for the yarn. Go down half a hook size, and make sure you’re using sc, not hdc, for the body. Gray or cream fiberfill also hides gaps better than bright white if you use darker yarn.
The gnome won’t stand up straight
Usually the base round wasn’t worked in BLO, so the bottom is rounded instead of flat, or the stuffing is lumpy at the base. Push the stuffing up and add a flat weight at the bottom. If he still wobbles, press the base down on a table for a minute to flatten it.
The hat leans or collapses
The hat needs some stuffing, especially in the lower half. Stuff a little every few rounds instead of all at the end. If you want a stiff, straight cone, add a rolled piece of cardboard or a pipe cleaner inside before closing.
The stitch count is off
This is the classic amigurumi problem, and it almost always comes from losing track of the first stitch of the round. Use a marker, count at the end of every round, and remember that the stitch in the marker counts as a stitch. If you’re still learning to read stitches, our single crochet guide shows how to spot the top loops clearly.
The beard looks thin or patchy
Add more strands closest to the nose and work them close together, then brush. Doubling up the strands (two at a time in each knot) fills the beard twice as fast.
Crochet gnome pattern FAQ
Are crochet gnomes good for beginners?
Yes. Gnomes are one of the easiest amigurumi shapes because there’s no head, no arms and very little sewing. If you can make a magic ring, single crochet, increase and decrease, you can make this gnome. The only new skill is attaching the beard, which is just fringe.
How long does it take to crochet a gnome?
Most people finish this 6-inch gnome in about 2 to 3 hours the first time. Once you know the pattern, you can make one in around 90 minutes. Brushing and trimming the beard takes longer than you’d think, so set aside 20 to 30 minutes for it.
What yarn is best for a crochet gnome?
Worsted weight acrylic is the best all-rounder: it’s affordable, comes in every color and holds its shape. Cotton gives very crisp stitches but doesn’t brush out well, so use acrylic or a wool blend for the beard. Fluffy brushed yarn, mohair blends or faux fur yarn make the softest beards.
How do you attach a beard to a crochet gnome without glue?
Use the fringe method: fold a strand of yarn in half, pull the loop under a stitch with your crochet hook, then pull the ends through the loop and tighten. Repeat in a U shape under the nose, then brush and trim. You can also crochet a flat loop-stitch beard and sew it on.
How do you make a crochet gnome stand up?
Work one round in the back loops only right after the base increases. That makes a flat bottom. Then stuff firmly and add a small weight, like poly pellets in a bag or a smooth stone, at the bottom before you stuff the rest.
How big is a crochet gnome?
It depends on the yarn and hook. This pattern makes a gnome about 6 inches tall in worsted yarn with a 4.0 mm hook. The same pattern in DK yarn with a 3.0 mm hook makes a 4 to 4½-inch ornament, and in bulky yarn with a 6.0 mm hook it grows to roughly 8 to 9 inches.
Can I sell gnomes made from this pattern?
Yes, you’re welcome to sell finished gnomes you make from this pattern at craft fairs or online. We just ask that you don’t share or sell the written pattern itself, and a credit to Yarvella Crochet is always appreciated.
Make your first gnome tonight
A crochet gnome is the kind of project that gives you a finished, giftable piece in a single evening, and every one you make comes out a little different. Start with the classic red-hat version, then play with colors, beards and sizes until you have a whole village lined up on your mantel. If this is your first time working in the round, the gnome is a perfect bridge to bigger amigurumi.
When you finish yours, snap a picture and tag @yarvella.crochet; we love seeing your gnomes. And if you’re looking for something to make next, try our easy crochet Christmas stocking to hang right next to him.
Keep making

Easy Crochet Christmas Ornaments: 5 Free Beginner Patterns
Make 5 easy crochet Christmas ornaments: a candy cane, bauble, star, mini hat and holly, with free beginner patterns in US terms, tips…
Read the guide
Gifts for Crocheters: 30 Ideas They’ll Actually Use (by Budget)
The best gifts for crocheters, sorted by budget: ergonomic hooks, yarn tools, project bags, stocking stuffers and handmade ideas, plus how to buy…
Read the guide