
Amigurumi for Beginners: Easy Guide + Free Snowman Pattern
Amigurumi for beginners made simple: the best yarn, hook and stuffing, 5 must-know techniques, common mistakes and a free easy snowman ornament pattern.
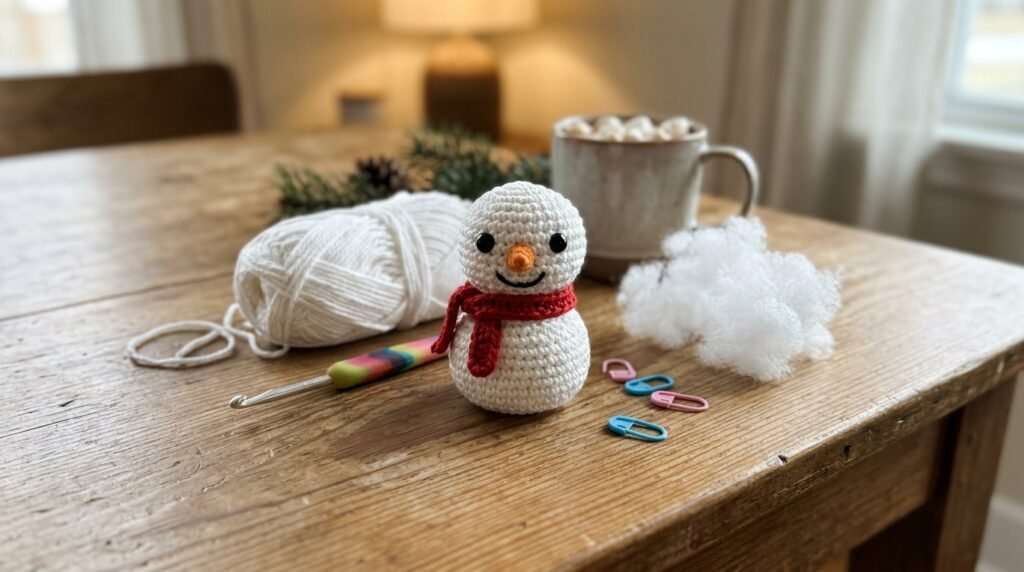
Those tiny crocheted animals and plump little characters all over Pinterest look hard. They aren’t. If you can make a slip knot and a single crochet, you already know most of what amigurumi needs. The rest is a handful of small habits: working in a spiral, counting stitches, and stuffing well.
This guide to amigurumi for beginners takes you from “what even is a magic ring?” to a finished toy you can hang on the tree this Christmas. You’ll get a plain-English supply list, the five techniques that matter, the mistakes almost everyone makes on their first piece, and a free beginner pattern for a little snowman ornament.
In this guide
- What is amigurumi (and how is it different from crochet)?
- Is amigurumi good for beginners?
- Amigurumi supplies: yarn, hook, stuffing and eyes
- 5 techniques every amigurumi beginner needs
- Free pattern: easy amigurumi snowman ornament
- Common beginner mistakes (and quick fixes)
- What to make next
- Amigurumi for beginners FAQ
What is amigurumi (and how is it different from crochet)?
Amigurumi is the Japanese word for small stuffed toys made from yarn. It roughly combines “ami” (crocheted or knitted) and “nuigurumi” (stuffed doll). Most amigurumi today is crocheted, and that’s what we’ll focus on.
So amigurumi isn’t a different craft from crochet. It’s a style of crochet. The difference is in how the fabric is built:
- Flat crochet (scarves, blankets, dishcloths) is worked in rows, turning at the end of each one.
- Amigurumi is worked in the round, usually in a continuous spiral, so the piece grows into a 3D shape like a ball, tube or cone.
- Stitches are tighter. You use a smaller hook than the yarn label suggests so the stuffing doesn’t show through.
- Shaping comes from increases and decreases, not from changing stitch types. Add stitches and the piece gets wider; remove them and it closes up.
Almost every amigurumi pattern uses just one stitch: the single crochet. If yours needs a refresher, our guide on how to single crochet walks through it step by step.
Is amigurumi good for beginners?
Yes, with one small catch. Amigurumi is a great second or third project for a new crocheter. It’s small, cheap and quick, and you only need one stitch. The catch is that the first few rounds feel fiddly. You’re working tight stitches into a tiny circle, and that’s awkward for anyone the first time.
Here’s a fair way to think about it:
- If you’ve never held a hook, spend an evening on chains and single crochet rows first. Our crochet for beginners lesson covers that in one sitting.
- If you can single crochet a straight row, you’re ready for amigurumi right now.
- If you’ve made a granny square or a hat, you’ll probably find amigurumi easier than you expect.
Is amigurumi harder than regular crochet?
It isn’t harder, just more precise. A scarf forgives a missed stitch. A sphere with one missing stitch per round turns lumpy fast. Amigurumi rewards counting and patience more than skill. The good news: because pieces are small, mistakes are cheap. Pulling out one round of a 30-stitch ball takes a minute.
What is the easiest thing to make in amigurumi?
A ball. Nearly every amigurumi shape is a ball that’s been squashed, stretched or stacked. Once you can make a smooth ball, you can make:
- Two stacked balls: a snowman (today’s pattern)
- A ball with ears: a bear, cat or bunny head
- A stretched ball: a whale, egg or pickle
- A cone: a gnome hat or mini Christmas tree
- A flat circle that stops increasing: a little bowl or a cupcake base
Amigurumi supplies: yarn, hook, stuffing and eyes
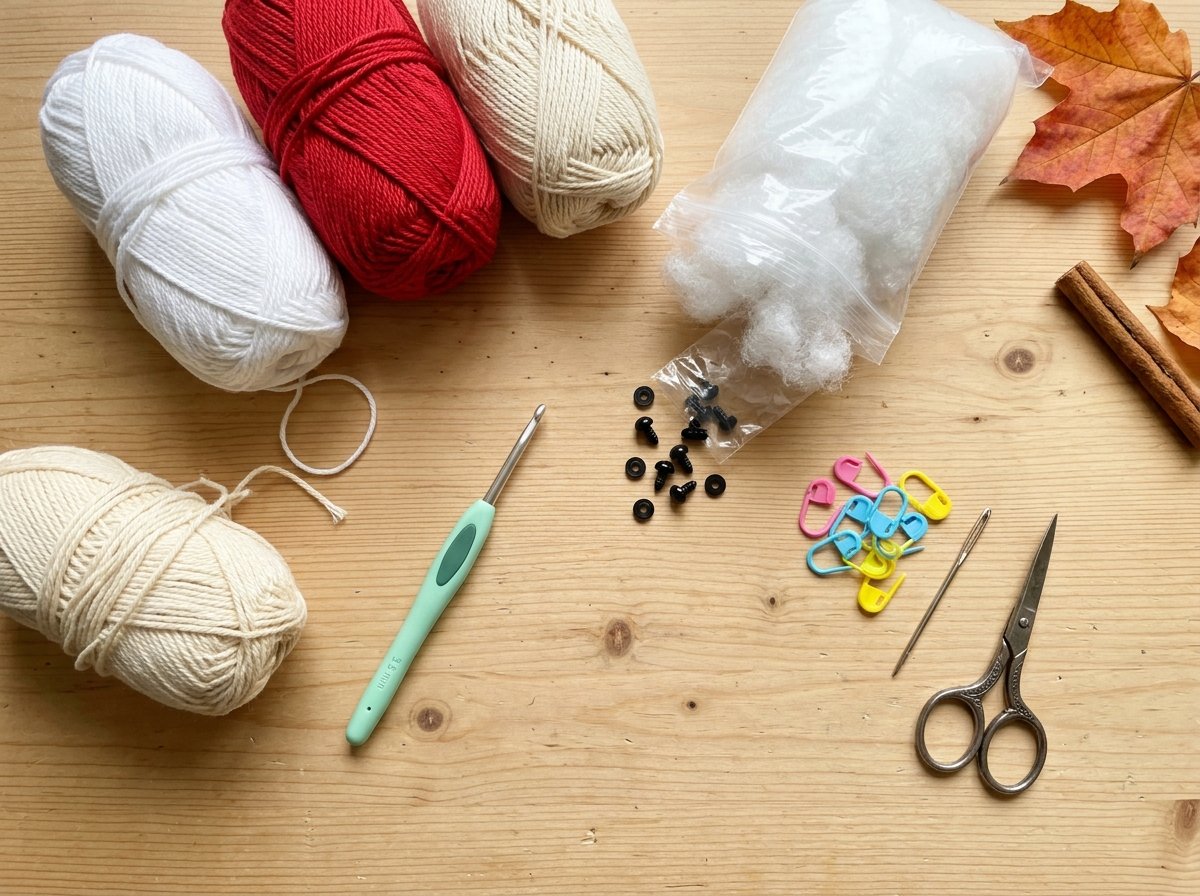
You don’t need a kit. Most of this is already in a beginner’s yarn basket, and the rest costs only a few dollars at any US craft store.
Which type of yarn is best for amigurumi?
For a first project, use a smooth, light-colored, worsted weight (#4) yarn. Both of these work well:
- Cotton or cotton blend. This gives the crisp, defined stitches you see in Pinterest photos. It barely stretches, so your stitch counts stay honest. It’s a little harder on the hands.
- Acrylic. It’s soft, cheap, comes in every color and is easy to find at big-box craft stores. Pick a smooth, plied acrylic, not a fluffy one.
Skip these for now: dark colors (you can’t see your stitches), fuzzy or eyelash yarn, chenille and “blanket” yarn (beautiful, but very hard to count), and anything splitty. Light gray, cream, white or a pastel is perfect.
What size crochet hook for amigurumi?
Go one or two sizes smaller than the yarn label recommends. For worsted weight yarn, a 3.5 mm (E/4) or 3.75 mm (F/5) hook is the sweet spot. An ergonomic handle helps, because tight stitches put more strain on your hand than loose rows do.
What’s the best stuffing for amigurumi?
Polyester fiberfill (often labeled “poly-fil”) is the standard choice. It’s light, washable, holds its shape and doesn’t clump if you add it in small tufts. A single bag lasts for dozens of small toys. Cotton stuffing and wool roving also work but tend to pack down over time. Avoid cotton balls, which go lumpy.
Full beginner supply checklist
- Worsted weight (#4) yarn in a light color, plus small amounts of accent colors
- 3.5 mm (E/4) crochet hook
- Polyester fiberfill stuffing
- Safety eyes, 6–9 mm (or black yarn to embroider eyes)
- Locking stitch markers (a safety pin or scrap of contrasting yarn works too)
- Blunt tapestry (yarn) needle for sewing and weaving in ends
- Small scissors
- Optional: a chopstick or the back of a pencil for pushing in stuffing
5 techniques every amigurumi beginner needs
These five skills cover almost every beginner amigurumi pattern. Patterns are written in US crochet terms with standard abbreviations. If any shorthand looks unfamiliar, keep our crochet abbreviations cheat sheet open in another tab.
1. The magic ring (MR)
The magic ring, also called the magic circle, is an adjustable loop you crochet into and then pull closed. It leaves no hole at the center of your piece.
- Wrap the yarn around two fingers so the tail end crosses over the working yarn and forms an X.
- Insert your hook under the loop on your fingers, grab the working yarn and pull up a loop.
- Chain 1 to secure it. This chain does not count as a stitch.
- Work single crochet stitches into the ring, over both the loop and the tail. Usually you’ll make 6.
- Pull the tail firmly. The ring cinches closed into a tight little circle.
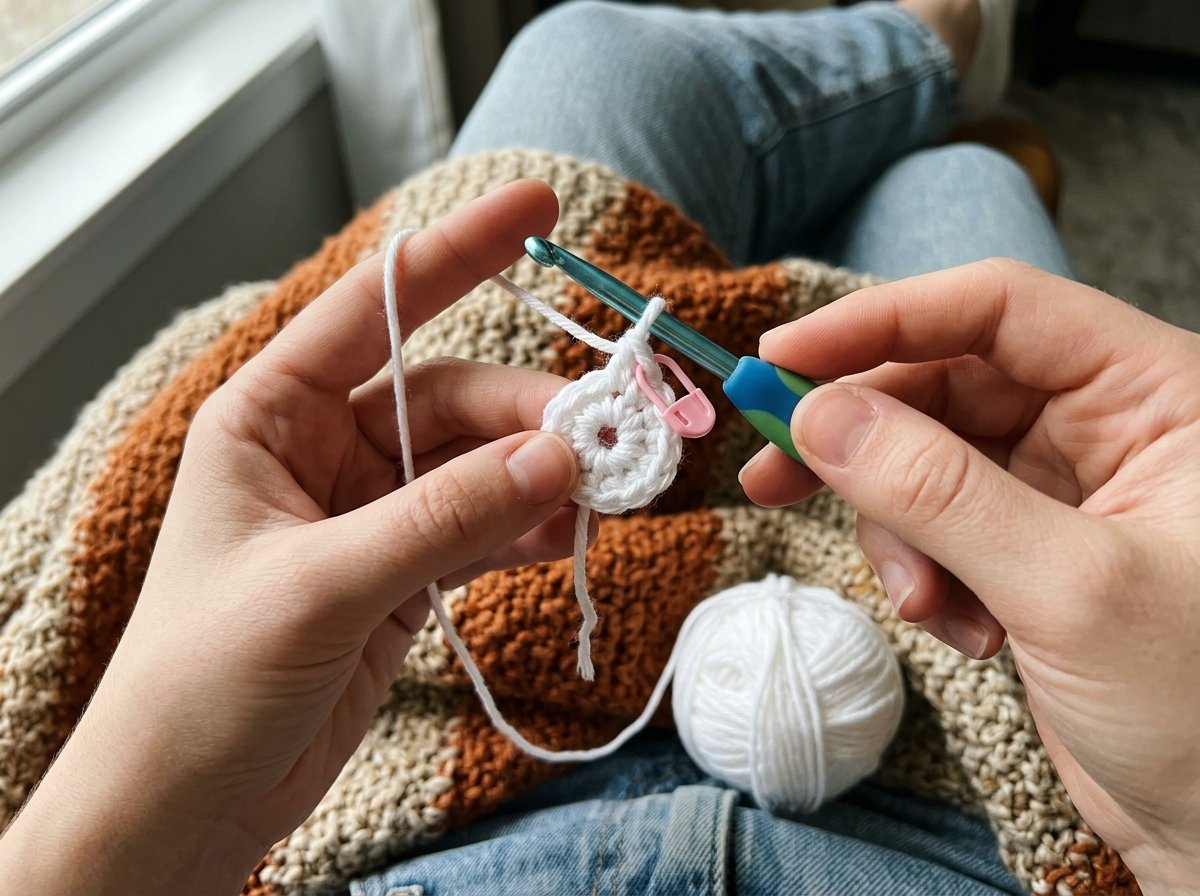
Can’t get the magic ring to work? Use the fallback: chain 2, then work your 6 single crochet into the second chain from the hook. You’ll get a tiny hole in the middle, but on a first toy nobody will notice.
2. Working in a continuous spiral
Most amigurumi doesn’t join rounds with a slip stitch. You just keep going: after the last stitch of Round 1, work straight into the first stitch of Round 2. This avoids a visible seam. The downside is that you can’t see where one round ends, which brings us to the next skill.
3. Using a stitch marker
Clip a stitch marker into the first stitch of every round. When you come back around to it, take it out, work that stitch, and put the marker back in the stitch you just made. This one habit prevents most beginner frustration. Count your stitches at the end of every round and compare with the number in parentheses in the pattern.
4. Increases (inc) and invisible decreases (dec)
- Increase (inc): work 2 single crochet in the same stitch. Your round gains one stitch.
- Invisible decrease (dec): insert your hook into the front loop only of the next stitch, then the front loop only of the stitch after it (3 loops on hook). Yarn over and pull through the two front loops (2 loops on hook). Yarn over and pull through both. Two stitches become one, and the decrease is almost invisible from the outside.
Patterns spread these out evenly, which is why you’ll see repeats like “(sc, inc) x6”. That means single crochet in the next stitch, increase in the next, and repeat that pair six times.
5. Stuffing and closing
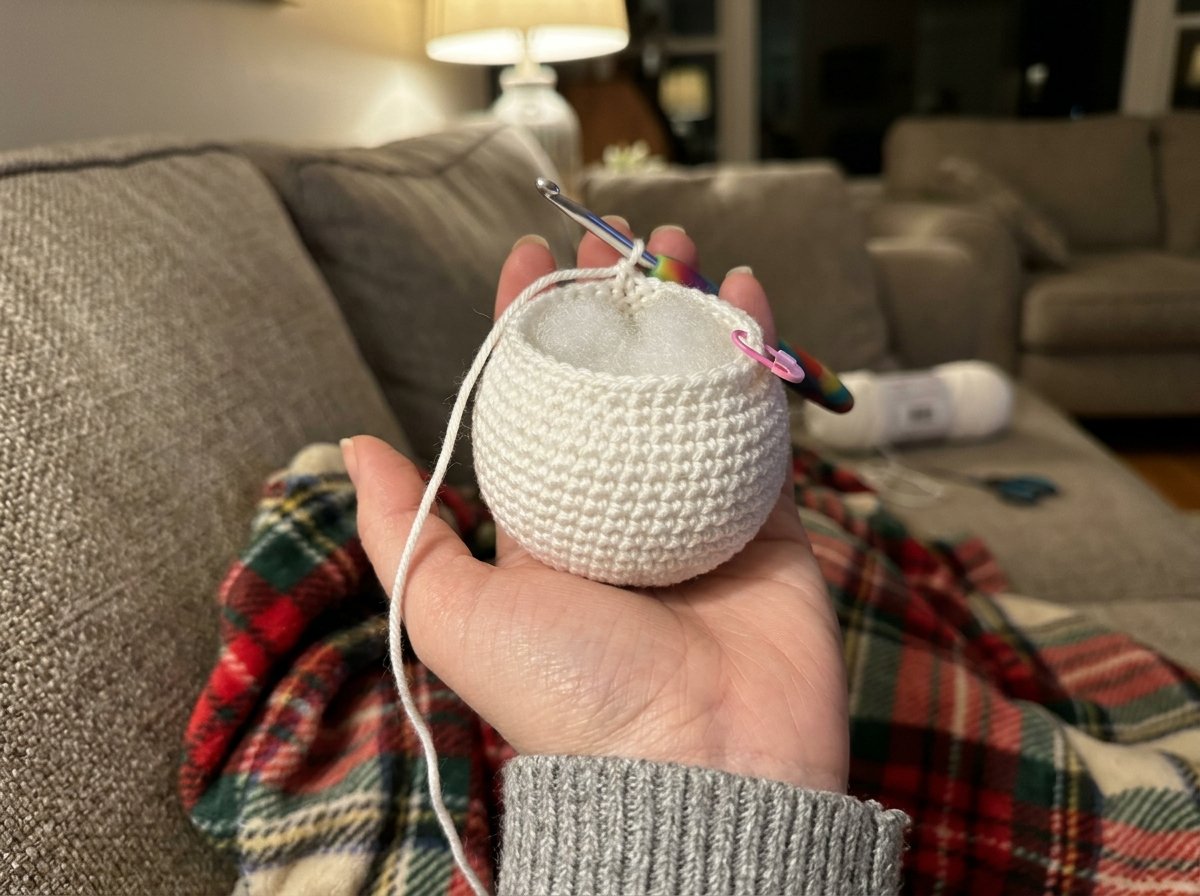
Start stuffing when the opening is about the size of a quarter, usually two or three rounds before the end. Add fiberfill in small tufts and push it toward the outside walls first, then fill the center. It should feel firm and springy, not squishy. After the final round (usually 6 stitches), cut the yarn, thread the tail onto your needle, weave it through the front loop of each remaining stitch and pull it closed like a drawstring.
Free pattern: easy amigurumi snowman ornament
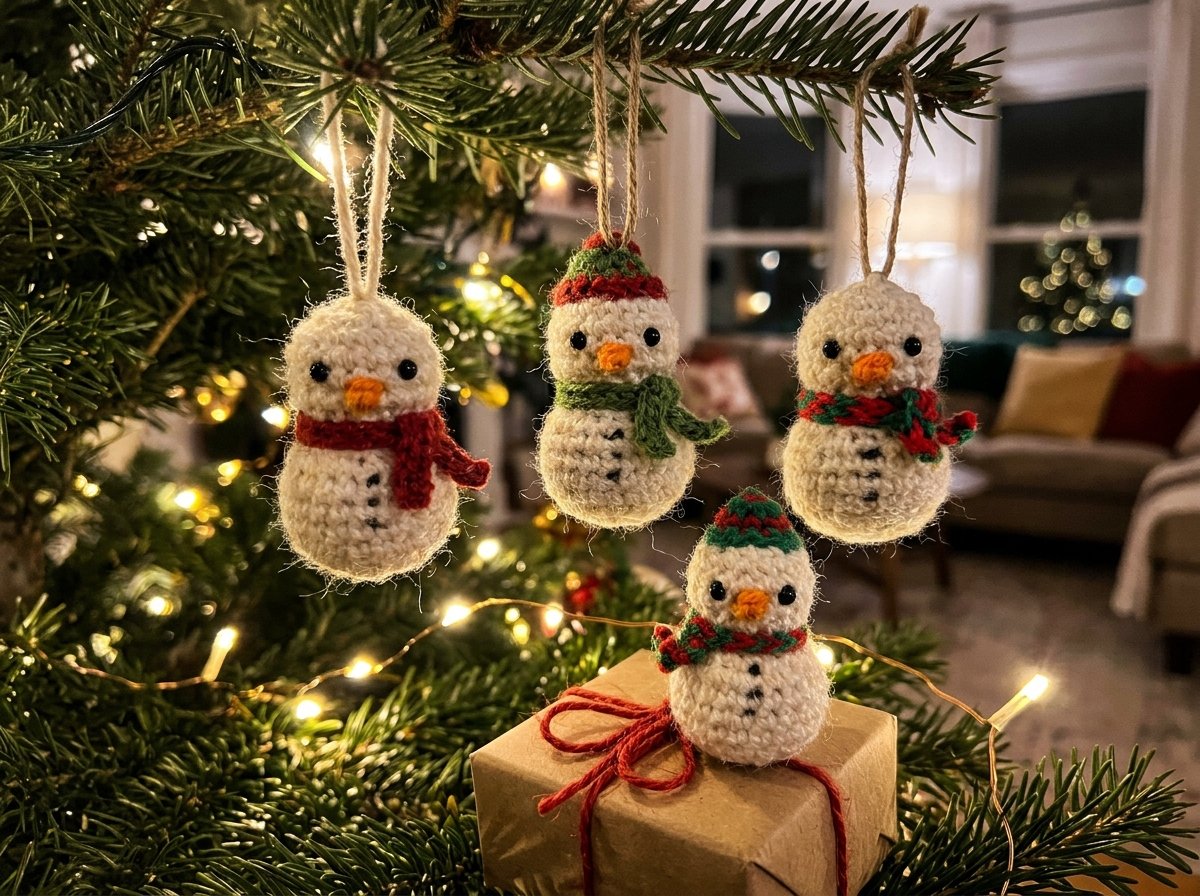
This little snowman is two balls, a tiny cone and a strip of half double crochet. That makes him the ideal first amigurumi, and he’s perfect timing for the holidays. Make one for your tree, or a few as gift toppers.
- Difficulty: Beginner
- Time: about 1.5–2.5 hours for your first one (closer to 1 hour once you’ve made a couple)
- Finished size: about 3.5 in (9 cm) tall with worsted weight yarn and a 3.5 mm hook
- Yarn: worsted weight (#4) cotton or acrylic. White, about 25 yd; red or green, about 8 yd; orange, about 2 yd; black, about 1 yd (optional, for embroidery)
- Hook: 3.5 mm (E/4), plus 4 mm (G/6) for the scarf (optional)
- Notions: two 6 mm safety eyes, fiberfill, stitch marker, yarn needle, scissors
Abbreviations (US terms): MR = magic ring; sc = single crochet; inc = 2 sc in the same stitch; dec = invisible decrease; hdc = half double crochet; ch = chain; st(s) = stitch(es); FO = fasten off. Numbers in parentheses are your stitch count at the end of the round. Work in a continuous spiral and move your marker up each round.
Body (white)
- Rnd 1: 6 sc in MR. (6)
- Rnd 2: inc in each st around. (12)
- Rnd 3: (sc, inc) x6. (18)
- Rnd 4: (2 sc, inc) x6. (24)
- Rnd 5: (3 sc, inc) x6. (30)
- Rnds 6–10: sc in each st around. (30) That’s 5 rounds with no increases.
- Rnd 11: (3 sc, dec) x6. (24)
- Rnd 12: (2 sc, dec) x6. (18) Start stuffing firmly now.
- Rnd 13: (sc, dec) x6. (12) Top up the stuffing.
- Rnd 14: dec x6. (6) FO and close the hole with the drawstring method. Weave in the end.
Head (white)
- Rnd 1: 6 sc in MR. (6)
- Rnd 2: inc in each st around. (12)
- Rnd 3: (sc, inc) x6. (18)
- Rnd 4: (2 sc, inc) x6. (24)
- Rnds 5–8: sc in each st around. (24)
- Insert safety eyes between Rnds 5 and 6, about 4 stitches apart. Snap the backs on firmly.
- Rnd 9: (2 sc, dec) x6. (18) Start stuffing.
- Rnd 10: (sc, dec) x6. (12) Finish stuffing.
- Rnd 11: dec x6. (6) FO, leaving a 12-inch tail for sewing. Close the hole.
Carrot nose (orange)
- Rnd 1: 4 sc in MR. (4)
- Rnd 2: (sc, inc) x2. (6)
- Rnd 3: sc in each st around. (6) FO, leaving a 6-inch tail. No stuffing needed.
Scarf (red or green)
Using a 4 mm hook (or your 3.5 mm if you prefer), ch 40. Hdc in the 3rd ch from the hook and in each ch across. (38 hdc) FO and weave in the ends. For fringe, knot two 1-inch strands of yarn into each end.
Assembly
- Sew the nose to the center of the face, one round below the eyes.
- Place the head on the body with the closed “drawstring” ends touching. Sew all the way around the joint using the head’s long tail, going through both pieces several times so the head doesn’t wobble.
- Optional: embroider three small black “coal” buttons down the front of the body.
- Wrap the scarf around the neck and tie it loosely at one side.
- To make an ornament: thread a 6-inch piece of yarn or thin ribbon through the top of the head and knot it into a loop.
Safety note: safety eyes, buttons and small parts aren’t suitable for babies or toddlers under 3. For a toy meant for little ones, embroider the eyes with black yarn instead.
Common beginner mistakes (and quick fixes)
- Stuffing shows through the stitches. Your hook is too big or your tension is loose. Drop a hook size. Also make sure you’re wrapping the yarn the way the pattern expects (see “yarn under vs yarn over” in the FAQ).
- The piece curls the wrong way or looks inside out. Amigurumi has a “right side” with little V-shaped stitches. If your piece turns into a cup, push it right-side out so the Vs face outward and keep crocheting. Your hook stays on the outside of the piece.
- Your stitch count keeps drifting. You’re probably missing the first stitch or working twice into the last one. Move your marker every round and count before you start the next.
- The ball looks hexagonal. Stacking increases right above each other creates corners. On bigger pieces, stagger them. For example, write Round 5 as “sc, inc, (3 sc, inc) x5, 2 sc” instead of “(3 sc, inc) x6”. On a small ornament it’s fine to ignore this.
- The toy is lumpy or saggy. Add stuffing in small tufts and pack it more firmly than feels right. Amigurumi softens as the stuffing settles.
- The magic ring comes undone. After pulling it closed, weave the starting tail back and forth through a few stitches on the inside before trimming.
- Parts sewn on crooked. Pin everything in place with sewing pins first, look at it from a few angles, then sew.
What to make next
Once your snowman is on the tree, try making the same ball shape with a couple of changes. Add two small half-circle ears to the head and you have a bear. Make a single ball in red or green, add a tiny hanging loop, and you have a classic bauble ornament. For more seasonal makes that use the same skills, see our crochet snowflake ornaments and these quick crochet Christmas gifts you can finish in one evening.
Ready for a full character with clear photos and stitch counts for every round? The Yarvella pattern shop has printable PDF patterns written with beginners in mind.
What crochet amigurumi sells best?
If you’re thinking about selling at craft fairs or online later, small, giftable pieces tend to move fastest. Think keychains, ornaments, mini animals, plant-style toys and seasonal characters like snowmen, gnomes and pumpkins. They’re quick to make, so you can price them fairly and still make your time worth it. Larger stuffed animals sell too, but they take many more hours. Start small, take clear photos, and see what your buyers respond to.
Amigurumi for beginners FAQ
Is amigurumi good for beginners?
Yes. Amigurumi mostly uses one stitch, the single crochet, and small projects that need very little yarn. If you can already single crochet a straight row, you can make a simple ball-shaped amigurumi. Expect the first few rounds to feel fiddly; it gets much easier by your second piece.
What is the difference between crochet and amigurumi?
Amigurumi is a type of crochet. Regular crochet projects are often worked flat in rows. Amigurumi is worked tightly in continuous rounds to build 3D shapes, which are then stuffed and assembled into toys or decorations.
Which type of yarn is best for amigurumi?
Beginners do best with a smooth, light-colored worsted weight (#4) cotton, cotton blend or acrylic. Cotton gives crisp stitch definition. Acrylic is softer, cheaper and easy to find. Avoid fuzzy, chenille or dark yarns until you’re comfortable counting stitches.
What’s the best stuffing for amigurumi?
Polyester fiberfill is the most popular choice. It’s light, washable, holds its shape and doesn’t clump when added in small tufts. Stuff firmly, because amigurumi softens over time.
What size hook should I use for amigurumi?
Use a hook one or two sizes smaller than your yarn label recommends. With worsted weight yarn, most people use a 3.5 mm (E/4) or 3.75 mm (F/5) hook. That keeps the fabric tight enough that stuffing doesn’t peek through.
Should I yarn over or yarn under for amigurumi?
Both work. Many amigurumi makers use “yarn under” (grabbing the yarn from below instead of wrapping it over the hook) for the final step of each single crochet. It makes stitches look like neat Xs and tightens the fabric. If your stitches look loose, try it, but it changes the look slightly, so stay consistent within one piece.
What is the hardest animal to crochet?
Animals with many small, separate parts tend to be the trickiest. Think giraffes, octopuses, horses with manes, or anything with thin legs that must stand up on its own. They involve lots of color changes, sewing and careful shaping. Save those for after you’re comfortable with balls, cones and simple assembly.
How long does it take to make an amigurumi?
A small beginner piece like the snowman above takes about 1.5–2.5 hours the first time. Palm-sized animals usually take an evening or two. Larger dolls with clothes and many parts can take 10 hours or more.
Your first amigurumi is closer than you think
Amigurumi for beginners really comes down to one stitch, a magic ring, a stitch marker and the patience to count to 30. Make a ball, then make a snowman, and you’ll have the foundation for nearly every toy pattern out there. Grab a light-colored yarn, a 3.5 mm hook and a bag of stuffing tonight. By the weekend you could have a whole family of little snowmen on your tree.
If you make one, share it and tag us. We love seeing your first amigurumi! For more beginner-friendly ideas, browse our easy crochet projects for beginners.
Keep making

Easy Crochet Christmas Ornaments: 5 Free Beginner Patterns
Make 5 easy crochet Christmas ornaments: a candy cane, bauble, star, mini hat and holly, with free beginner patterns in US terms, tips…
Read the guide
Gifts for Crocheters: 30 Ideas They’ll Actually Use (by Budget)
The best gifts for crocheters, sorted by budget: ergonomic hooks, yarn tools, project bags, stocking stuffers and handmade ideas, plus how to buy…
Read the guide