
How to Crochet Slippers for Beginners: Easy Rectangle Pattern + Size Chart
Learn how to crochet slippers for beginners with an easy folded-rectangle pattern, a size chart for kids, women and men, non-slip sole tips and an FAQ.
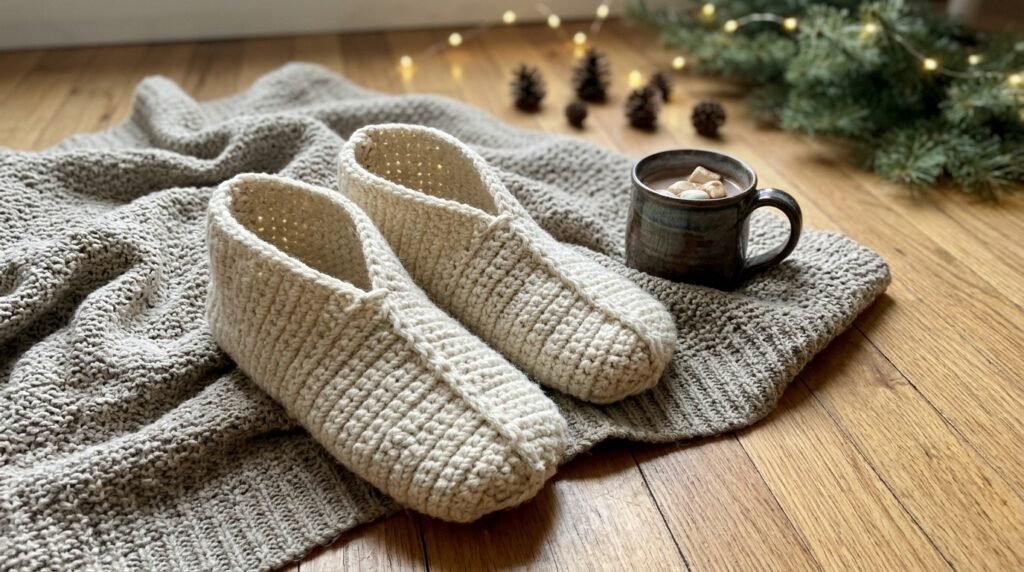
Cold floors, a stack of holiday gifts to make, and a skein of chunky yarn on the couch: that’s usually when the idea hits. Could I crochet a pair of slippers? If you can make a chain and a half double crochet, the answer is yes. You don’t need shaping, increases, or a complicated chart.
This guide shows you how to crochet slippers for beginners using one of the easiest designs there is: a flat rectangle that you fold and stitch into a slipper. You’ll get a materials list, a size chart for kids, women and men, row-by-row instructions in US terms, a simple non-slip sole fix, and answers to the questions people ask most before their first pair.
Quick answer: The easiest way to crochet slippers as a beginner is the rectangle method. Crochet a flat rectangle in half double crochet with bulky (#5) yarn and a 6 mm (J-10) hook, sized to your foot length and foot width. Fold it in half, gather the toe end closed, seam the top of the foot and the heel, and add a cuff if you like. Most beginners finish one pair in about 2–4 hours.
Key Takeaways
- Rectangle slippers use only chains and half double crochet (hdc), worked in straight rows.
- Size them with two measurements: foot length and the circumference around the widest part of your foot.
- Bulky (#5) yarn and a 6 mm hook make a thick, warm fabric that works up fast.
- Crochet stretches, so make the slipper about 3/4 inch shorter than your foot for a snug fit.
- Crochet slippers are slippery on hard floors. Dimensional fabric paint dots or sewn-on suede soles fix that.
Table of Contents
- Can You Crochet Slippers as a Beginner?
- What You Need to Crochet Slippers
- Crochet Slipper Size Chart (Kids, Women, Men)
- How to Crochet Slippers for Beginners: Step by Step
- Optional: Add a Cozy Cuff
- How to Make Crochet Slippers Non-Slip
- Best Yarn for Crochet Slippers
- Common Mistakes (and Easy Fixes)
- Turning Slippers into a Holiday Gift
- FAQ
- Final Thoughts
Can You Crochet Slippers as a Beginner?
Yes, and slippers are one of the most satisfying early projects you can pick. They’re small, so you finish quickly. They’re useful every single day. And the rectangle method skips everything that usually scares beginners away from footwear: no working in the round, no increases for a sole, and no counting decreases around a toe.
Here’s the idea in one sentence: you crochet a flat rectangle, fold it in half like a book, and the folds and seams turn it into a slipper. The toe is gathered closed with a strand of yarn (like a drawstring bag), the heel is a short straight seam, and the top of the foot is sewn partway up, leaving an opening for your ankle.
If you’ve never held a hook before, work through our step-by-step first crochet lesson and practice a few rows of half double crochet first. Once a row of hdc feels comfortable, you’re ready.
Pattern at a glance
- Skill level: Beginner
- Stitches used: chain (ch), half double crochet (hdc), slip stitch (sl st), whipstitch seaming
- Yarn weight: Bulky (#5), or two strands of worsted (#4) held together
- Hook: 6 mm (US J-10)
- Time: about 2–4 hours per pair for a beginner, including seaming
- Gauge: about 11 hdc and 8 rows = 4 inches (10 cm)
What You Need to Crochet Slippers
- Bulky (#5) yarn: plan on roughly 120–150 yards (110–137 m) for a pair of women’s slippers, a little less for kids and a little more for men’s sizes or a tall cuff. Check the yardage on the label rather than the weight.
- 6 mm (J-10) crochet hook. If your fabric feels loose and airy, drop to 5.5 mm (I-9). Slippers should feel dense.
- Blunt yarn needle (tapestry needle) for seaming and weaving in ends.
- Tape measure.
- Scissors.
- Stitch markers (optional but handy for marking where to stop the top seam).
- Non-slip option: dimensional (puffy) fabric paint, or a pair of suede slipper soles.
Abbreviations (US terms): ch = chain, hdc = half double crochet, sl st = slip stitch, st(s) = stitch(es), RS = right side. Need a refresher? Keep our crochet abbreviations cheat sheet open in another tab.
Crochet Slipper Size Chart (Kids, Women, Men)
Every rectangle slipper comes down to two numbers:
- How many stitches across (this sets the slipper’s length, from heel to toe).
- How many rows (this sets how far the fabric wraps around your foot).
The chart below is based on the gauge above (11 hdc and 8 rows = 4 inches). Treat it as a starting point. Feet vary a lot, so measuring your own foot is the most reliable way to get a good fit.
| Size | Foot length | Stitches across | Rows |
|---|---|---|---|
| Kids small | about 6–7 in (15–18 cm) | 16 | 12 |
| Kids large | about 7–8 in (18–20 cm) | 19 | 13 |
| Women small (US 5–6) | about 8.75–9.25 in (22–23.5 cm) | 23 | 16 |
| Women medium (US 7–8) | about 9.25–9.75 in (23.5–25 cm) | 24 | 17 |
| Women large (US 9–10) | about 10–10.25 in (25.5–26 cm) | 26 | 18 |
| Men medium (US 9–10) | about 10.25–10.75 in (26–27.5 cm) | 27 | 19 |
| Men large (US 11–12) | about 11–11.5 in (28–29 cm) | 29 | 20 |
How to size slippers to your own foot
- Measure foot length from the back of the heel to the tip of the longest toe. Subtract 3/4 inch (2 cm). That’s how long your foundation row should be.
- Measure foot circumference around the widest part of the foot (across the ball of the foot, just behind the toes). Subtract 1/2 inch (1.3 cm). That’s how tall your rectangle should be.
- Crochet a small swatch of 12 hdc for 8 rows and measure it. Divide stitches by inches to get stitches per inch, then multiply by your foundation length. Do the same with rows.
Why subtract? Crochet fabric stretches with wear, especially at the toe. A slipper that fits snugly on day one will feel just right a week later. A slipper that fits perfectly on day one will start slipping off your heel.
How to Crochet Slippers for Beginners: Step by Step
The instructions below make one slipper. Make two identical pieces. The numbers in brackets are for women’s medium; swap in your size from the chart.
Step 1: Make the foundation chain
Leave a 12-inch (30 cm) tail. You’ll use it later to gather the toe closed, so don’t cut it short.
Foundation: Ch [stitches across + 2]. For women’s medium, ch 26.
Step 2: Crochet the rectangle
Row 1: Hdc in the 3rd ch from hook and in each ch across. The 2 skipped chains do not count as a stitch. [24 hdc]
Row 2: Ch 2 (does not count as a stitch), turn. Hdc in each st across. [24 hdc]
Rows 3 to [17]: Repeat Row 2. Count your stitches at the end of every few rows. The most common beginner problem is losing or adding a stitch at the edges.
Fasten off, leaving a long tail of about 20 inches (50 cm) for seaming.
Lay the rectangle flat and check it. It should measure close to your foot length minus 3/4 inch across, and close to your foot circumference minus 1/2 inch from bottom to top.
Step 3: Fold the rectangle
Fold the rectangle in half so the first row and the last row meet along the top. The fold line becomes the sole of your slipper. You now have a long tube that’s open along the top.
Decide which short end is the toe: it’s the end with your 12-inch starting tail.
Step 4: Gather the toe
Thread the starting tail onto your yarn needle. Weave it in and out through the ends of the rows along the toe edge, about one stitch in from the edge, all the way around. Pull firmly, like closing a drawstring bag, until the toe is gathered shut. Make a couple of stitches across the center to lock it, then knot securely on the inside.
Step 5: Seam the top of the foot
With the same yarn (or the fastening-off tail, if it’s at the toe end), whipstitch the first and last rows together along the top, starting at the gathered toe. Stop about one-third of the way along. On women’s sizes, that’s usually 3–3.5 inches (7.5–9 cm).
Try the slipper on now. If your foot slides in easily but the top gapes, sew a little further. If it’s hard to get your foot in, unpick a stitch or two. This is the moment to adjust.
Step 6: Seam the heel
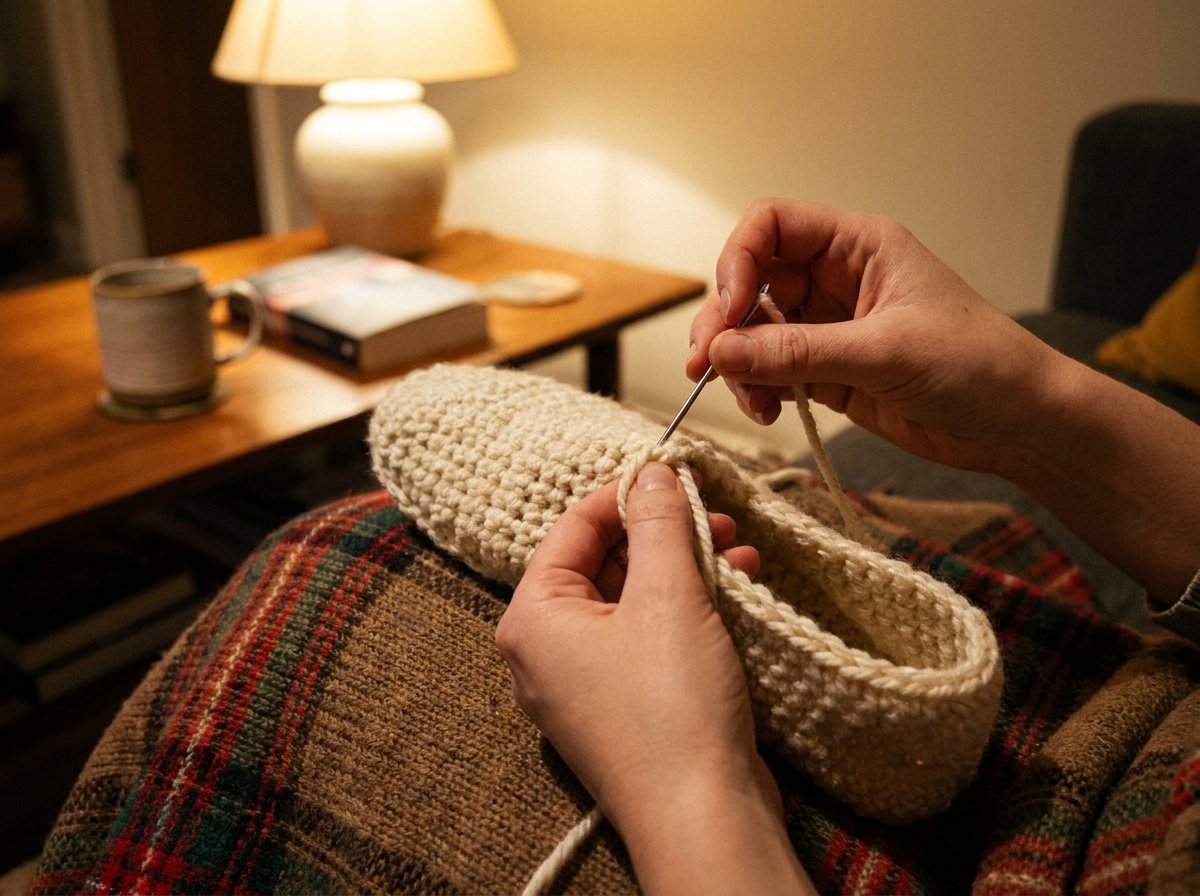
Thread the long fastening-off tail onto your needle. At the opposite short end, flatten the opening so the sole fold sits in the middle and whipstitch straight across from the sole up to the top edge. This creates a neat vertical heel seam. Knot on the inside and weave in the end.
Prefer a rounder heel? Gather it the same way you gathered the toe, but pull less tightly. Both options are beginner-friendly.
Step 7: Finish and repeat
Weave in all ends on the inside, going back and forth through a few stitches so they don’t work loose when you walk. Turn the slipper right side out. Make the second slipper exactly the same way, and count your rows so both match.
Optional: Add a Cozy Cuff
A cuff makes the slipper look finished and helps it stay on. It’s worked in rounds around the ankle opening.
- Join yarn with a sl st at the heel seam.
- Round 1: Ch 1, work single crochet evenly around the opening, about 1 stitch in each row end along the sides and 1 in each stitch along the seamed edge. Join with a sl st to the first stitch.
- Rounds 2–4: Ch 2 (does not count as a stitch), hdc in the back loop only of each stitch around. Join with a sl st. Back-loop stitches create a soft ribbed look.
- Fasten off and weave in the end. Fold the cuff down if you like a slouchy look, or leave it up for a sock-style slipper.
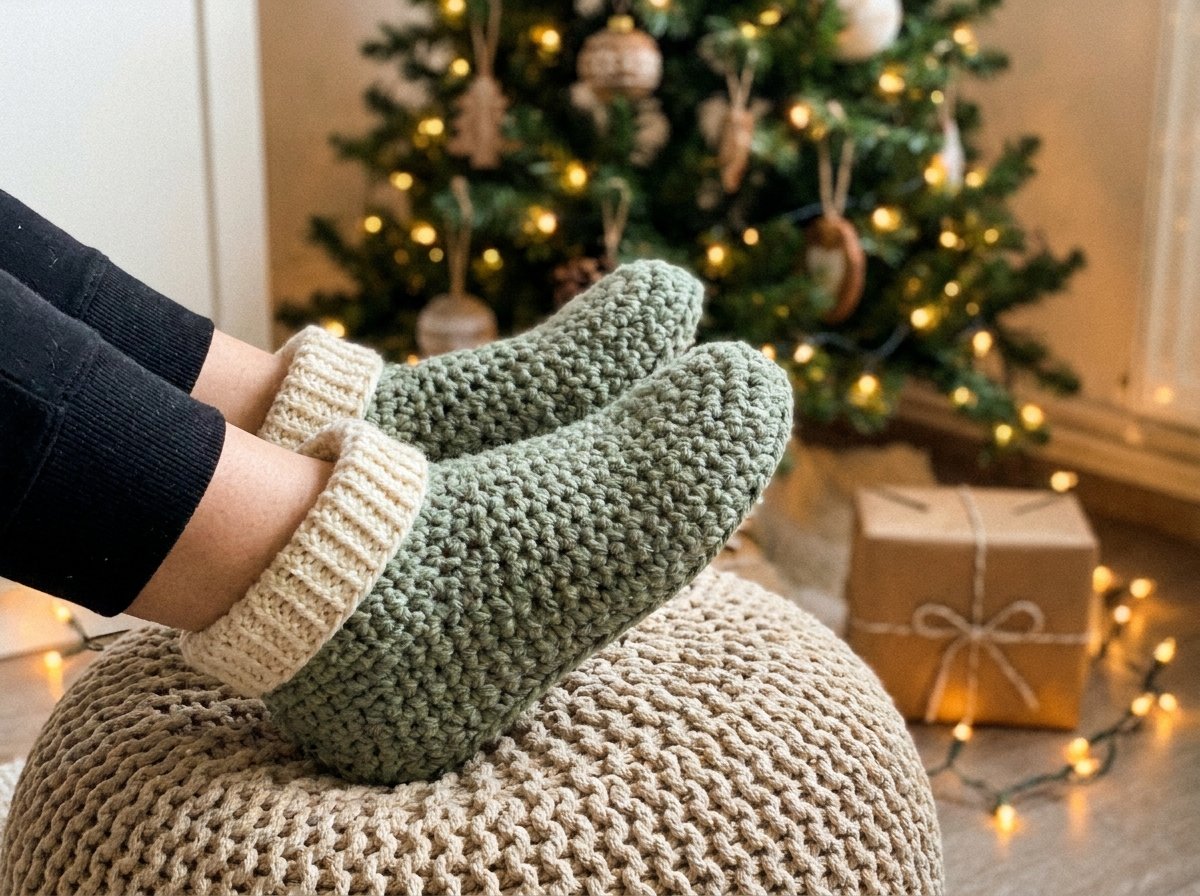
A contrast color on the cuff (cream with sage green, or gray with red for the holidays) is an easy way to make a simple pair look special.
How to Make Crochet Slippers Non-Slip
Yarn on hardwood, tile or laminate can be slippery. If anyone wearing the slippers will walk on hard floors, add grip. Here are three easy options, from quickest to sturdiest:
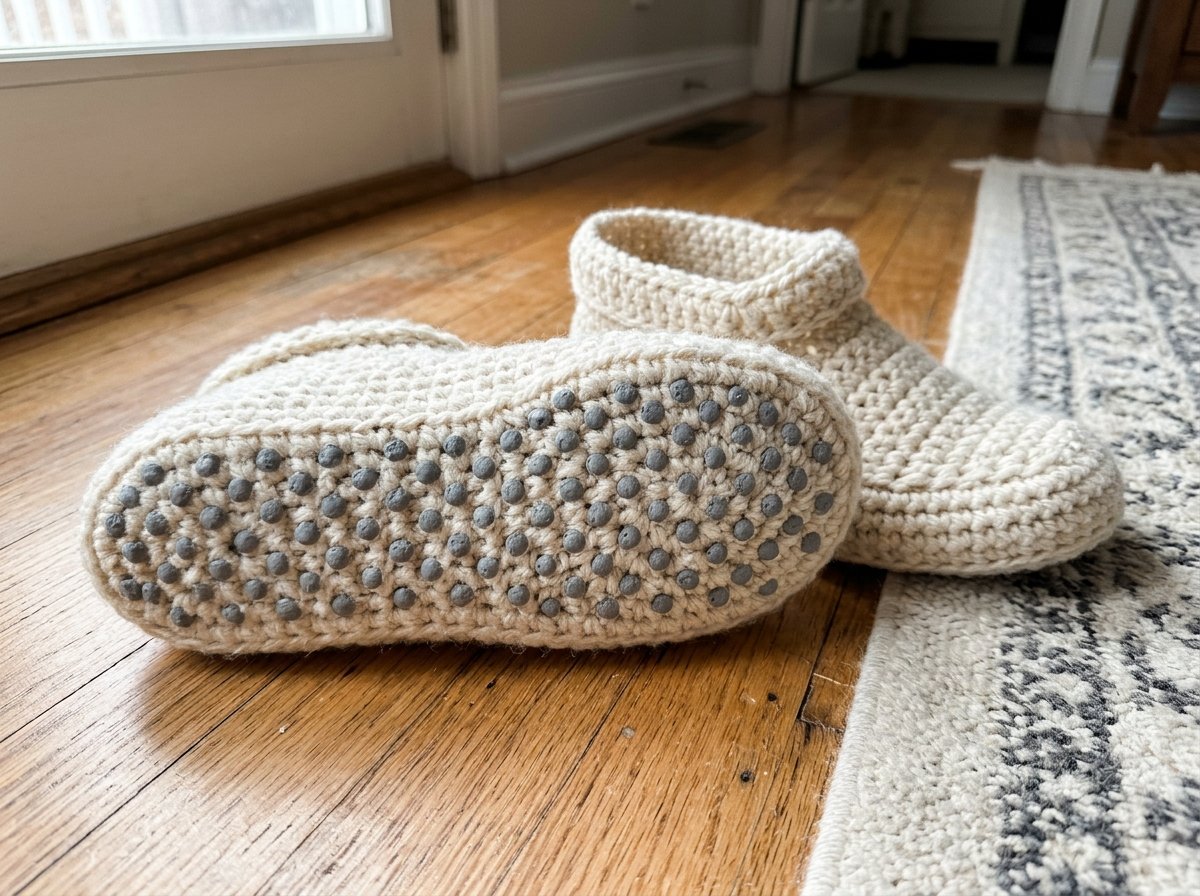
- Dimensional fabric paint dots. Put the slipper on a foot-shaped piece of cardboard so the sole is flat, then squeeze small dots or wavy lines across the sole. Let it dry fully before wearing. Check the bottle for cure time and washing instructions.
- Liquid latex or silicone grip. Brush-on sock grip products work the same way and cover more area. Test on a swatch first, since some can soak through thin fabric.
- Suede or leather soles. Pre-punched slipper soles are sewn on with yarn through the holes. They take longer but last the longest and make the slippers feel more like real shoes.
For toddlers and older relatives, don’t skip this step. Grip makes slippers safer as well as more comfortable.
Best Yarn for Crochet Slippers
The best yarn for crochet slippers is warm, dense, and easy to wash. Here’s how the common fibers compare:
| Fiber | Warmth | Washing | Good to know |
|---|---|---|---|
| Acrylic | Good | Usually machine washable | Affordable, easy for beginners, wide color range; can pill with heavy wear |
| Wool | Excellent | Hand wash unless labeled superwash | Very warm and springy; regular wool can felt and shrink in a hot wash |
| Wool blend | Very good | Check label | A nice middle ground between warmth and easy care |
| Cotton | Low | Machine washable | Breathable but heavy and stretches out; better for summer slippers |
Our pick for a first pair: a soft bulky acrylic or acrylic-wool blend. It’s forgiving, holds stitches clearly so you can count them, and can usually go in the washing machine.
Don’t have bulky yarn? Hold two strands of worsted (#4) yarn together and use the same 6 mm hook. The doubled strand makes an extra thick, cushioned fabric, which is great for slippers. Just make a swatch first, because your gauge may change slightly.
Common Mistakes (and Easy Fixes)
- Slippers that are too big. This is the most common issue. Remember to subtract length and width for stretch, and try on after the top seam.
- Edges that slant or wave. You’re adding or dropping stitches at the ends of rows. Put a stitch marker in the first and last stitch of every row until it becomes a habit.
- A fabric that’s too loose. Thin, airy fabric wears through quickly. Go down a hook size or use a doubled strand.
- A loose toe. If the gathered toe has a hole, run the tail through the edge a second time and pull tight, then add a few crisscross stitches across the center.
- Short tails. Cutting yarn too short makes seaming frustrating. Leave long tails; you can always trim later.
- Slippers that don’t match. Write down your stitch and row counts for slipper one and follow your notes for slipper two.
- The edge curling. If your rectangle curls before seaming, your foundation chain is probably tight. See our guide to why crochet curls and how to fix it.
Turning Slippers into a Holiday Gift
Handmade slippers are one of the most practical crochet gifts you can give. Everyone has cold feet in December, and a pair can be finished in an evening or two. A few ideas to make them gift-ready:
- Make a size or two up from the chart if you’re guessing a recipient’s size. A slightly roomy slipper is easier to wear than a tight one.
- Add a pom-pom or a small crochet heart on the top seam for a festive touch.
- Tuck a care card into the gift so they know how to wash them.
- Pair them with a mug of cocoa mix or cozy socks for a simple gift bundle.
Looking for more quick makes for your list? Browse our quick crochet gifts you can make in one evening. And if you’d like a printable pattern with photos to follow at your own pace, you’ll find Yarvella’s crochet patterns in our pattern shop.
FAQ
Can you crochet slippers if you’re a complete beginner?
Yes. Rectangle slippers only use chains and half double crochet worked in straight rows, plus simple seaming with a yarn needle. If you can crochet a scarf or a dishcloth, you can make these slippers.
What size crochet hook is best for slippers?
A 6 mm (US J-10) hook with bulky (#5) yarn is a good default. Slippers need a dense fabric, so many crocheters go down half a size from what the yarn label suggests. If your fabric looks holey, try a 5.5 mm (I-9) hook.
How much yarn do I need for crochet slippers?
Plan on about 120–150 yards (110–137 m) of bulky yarn for a pair of women’s slippers. Kids’ sizes need less, and men’s sizes or tall cuffs need more. Buying an extra skein in the same dye lot is cheap insurance.
How long does it take to crochet slippers?
Most beginners finish a pair of rectangle slippers in about 2–4 hours, including seaming and weaving in ends. As you get faster, you can make a pair in a single evening.
How do you make crochet slippers non-slip?
Add dots or lines of dimensional fabric paint to the soles, brush on a silicone or latex sock-grip product, or sew on pre-punched suede slipper soles. Let paint or grip products cure fully before wearing.
Can you wash crochet slippers?
It depends on the yarn. Most acrylic slippers can be machine washed on a gentle cycle and laid flat to dry. Regular wool should be hand washed in cool water to prevent felting. Always follow the care instructions on your yarn label.
Can I crochet slippers for men or kids with this pattern?
Yes. The rectangle method works for any size. Use the size chart, or measure the foot length and circumference and adjust the number of stitches and rows. Men’s slippers often look great in darker colors with a short cuff.
Final Thoughts
Learning how to crochet slippers for beginners is mostly about one smart shortcut: start with a flat rectangle and let folding and seaming do the shaping. Measure your foot, make the fabric a little smaller than you think, keep your stitch count steady, and add grip to the soles. That’s the whole secret.
Make your first pair for yourself, wear them for a week, and then you’ll know exactly how you like them to fit before you make a stack for the holidays. Happy hooking, and enjoy those warm toes!
Keep making
How to Block Crochet: Wet, Spray & Steam Blocking for Any Yarn
Learn how to block crochet the right way for wool, cotton and acrylic: step-by-step wet, spray and steam blocking, tools, drying times and…
Read the guide
Knitting vs Crochet: Which Is Easier, Faster and Better for You?
Knitting vs crochet compared: which is easier to learn, faster, uses less yarn, and suits blankets, sweaters and gifts, plus a 20-minute crochet…
Read the guide