
Moss Stitch Crochet: A Complete Guide to Even Rows and Neat Edges
Learn a small moss-stitch swatch with clear space placement, edge counts, troubleshooting and a practical way to adjust the fabric for a project.
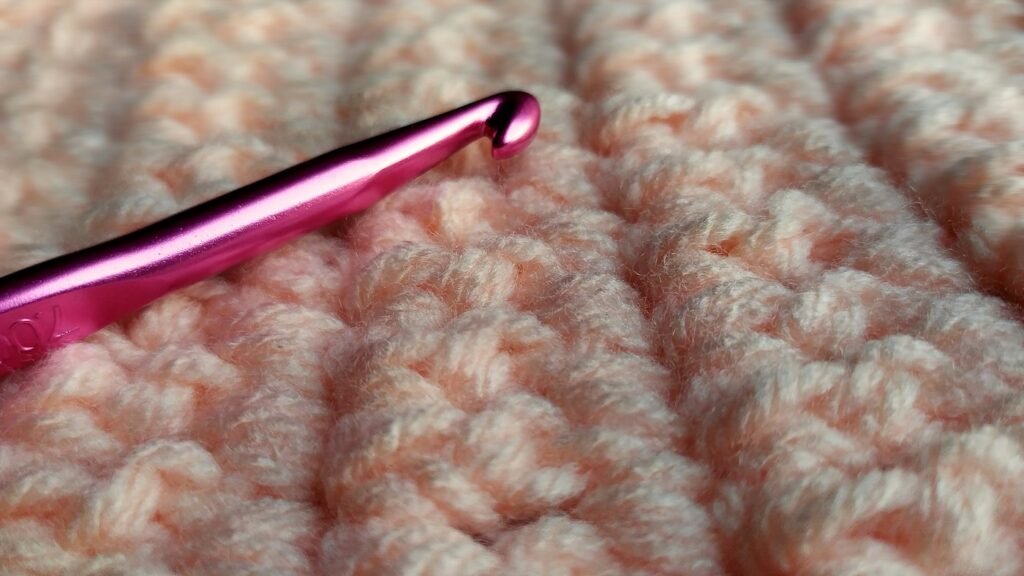
Moss stitch is a useful next step after learning single crochet. The basic movement is familiar, but the placement changes: you alternate a stitch and a chain, then work the next row into the spaces created below.
That small change produces an orderly texture without a long sequence to memorize. The difficult part for many beginners is the edge, where a turning chain can be mistaken for an ordinary stitch. This guide keeps the sample small and explains that final placement carefully.
What is moss stitch?
In crochet, the name moss stitch commonly describes alternating single crochet and chain-one spaces, with the single crochets of later rows placed into the spaces. You may also encounter the names linen stitch or granite stitch. Pattern naming is not perfectly uniform, so inspect the instructions rather than relying on a title alone.
The stitch can look balanced on both sides when worked in turned rows, particularly in one color. It is still worth making a sample: hook size, yarn texture and color changes affect the feel and appearance of the finished fabric.
Choose yarn that lets you see the spaces
Start with a smooth yarn in a light or medium shade. A tightly twisted surface can make the loops easier to distinguish than fluffy or strongly textured yarn. Dark colors are lovely, but they make small spaces harder to locate while you are learning.
Use a hook near the size suggested on the yarn label. Keep two stitch markers, scissors and a blunt yarn needle nearby. A ruler is useful, but the initial goal is a consistent sample rather than one promised measurement.
Do not begin by making an entire scarf width. A small exercise lets you practise the turn and the final space repeatedly, and it is easier to unravel if the count changes.
Understand the few terms you need
| Term | Meaning in this guide |
|---|---|
| ch | Chain |
| sc | Single crochet |
| ch-1 space | The opening beneath one chain between stitches |
| Turning-chain space | The opening at an edge beneath the starting chain-two of the previous row |
For single crochet, insert the hook, yarn over and draw up a loop, then yarn over and pull through both loops. For a chain, yarn over and pull through the loop already on your hook.
When an instruction says to work into a space, put the hook through that opening rather than under the top V of a single crochet. This distinction is the heart of the repeat. If you consistently place stitches into the Vs instead, you are making a different fabric.
Work a small practice swatch
This exercise begins with 20 chains. Keep the foundation relaxed enough that you can enter each chain comfortably. The loop on the hook is not included in the chain count.
Foundation row
- Chain 20.
- Work one single crochet into the fourth chain from the hook.
- Chain one, skip the next foundation chain and work one single crochet into the following chain.
- Repeat the previous step until you have worked into the final foundation chain.
- Turn the piece.
Count check: you should have nine single crochets and eight chain-one spaces between them. The skipped chains at the starting edge create a separate edge space. Do not count that edge opening as an ordinary interior chain-one space.
Place a marker in the final single crochet so you can see where the row ends. Inspect the other end and identify the opening beneath the starting chains; that is the edge space you will use on the next row.
Second row
- Chain two. This creates the new starting edge space.
- Work one single crochet into the first chain-one space of the previous row.
- Chain one and work one single crochet into the next chain-one space.
- Repeat across the interior spaces.
- After working into the last interior space, chain one and work the final single crochet into the starting edge space of the previous row.
- Turn.
Count check: nine single crochets again. There are eight chain-one spaces between the single crochets, plus the new starting edge space beneath the chain-two.
Third row and following rows
Repeat the second-row method. Chain two, work into each interior chain-one space with chain one between single crochets, then finish with a single crochet into the previous row’s turning-chain space. Keep the nine-single-crochet count unchanged.
Continue for enough rows to recognize the staggered placement. After a few rows, each single crochet should sit between single crochets from the row below rather than directly above one.
Why the last space matters
The final single crochet is easy to miss because the edge space can fold against the side of the fabric. If you stop after the last interior space, you have left out the final stitch and the row becomes narrower.
Mark the starting edge opening after making the chain-two. Move that marker each row once you are comfortable identifying the space. At the opposite edge, use a second marker to keep the final single crochet easy to see.
For the first several rows, count the single crochets as one group and the interior chain spaces as another. This is more informative than counting every visible loop as if it were the same kind of stitch. Keep using the same counting convention throughout your notes.
Troubleshoot before the sample gets larger
The sides are moving inward
First check for a missing final stitch in the turning-chain space. Unravel to the first row where the count changed and remake it. Trying to add an extra stitch several rows later can restore the width temporarily, but it does not fix the underlying edge structure.
The chain spaces are difficult to enter
You may be making the chains much tighter than the single crochets. Ease the grip on the working yarn while forming each chain. If the hook still cannot enter the spaces comfortably, test a fresh sample with a different hook rather than pulling hard on the existing fabric.
The starting chain is pulling the fabric into a curve
A tight foundation can restrict the lower edge. Make another short sample with a looser starting chain. You can also test a slightly larger hook for the foundation before returning to the working hook, but compare the result rather than treating this as an automatic fix.
The surface has uneven large holes
Check whether you accidentally chained twice in some repeats or skipped an interior space. Count the single crochets and spaces before changing the hook. Variable tension can also enlarge individual openings, but a counting error is the first thing to rule out.
Finish and inspect the sample
Cut the yarn with enough tail to weave in, then pull the tail through the final loop. Use a blunt needle to pass it through several suitable stitches and change direction before trimming. Inspect both faces so the tail is not left crossing a visible opening.
Wash and dry according to the yarn label. Measure only after the sample has dried completely. Notice whether the fabric has relaxed and whether you still like the size of its spaces.
Blocking should refine a consistent sample. It should not be used to stretch an uneven piece until the edges appear straight for a photograph. If a count has changed, correct that first.
Turn the sample into a project plan
For a simple cloth, choose a washable yarn and decide the width after measuring your sample. For a scarf, judge the fabric against your neck and clothing before committing to a long piece. For a blanket, compare weight and flexibility with another stitch you enjoy.
The foundation in this exercise uses an even chain count. If you adjust the width, use an even count that preserves the same structure and keep the turning instructions unchanged. Measure the resulting sample; a specific chain count cannot guarantee a fixed width across different yarns and makers.
Work in one color until the repeat feels reliable. Then try a short striped sample and examine the color changes at both edges. Secure the tails before deciding whether the striped fabric looks equally tidy on both sides.
Common questions
Is moss stitch suitable for a complete beginner?
It is approachable after you can make chains and single crochet. The new skill is identifying spaces and recognizing the turning-chain opening.
Do I work into the single crochets below?
In the repeated rows of this exercise, no. Work into the chain spaces and the final edge space as described. Different patterns may include special setup or border rows, so follow their specific instructions.
Can I change the number of chains?
Yes. For this version, keep an even foundation-chain count and make a new width sample before planning your finished piece.
Why does another moss-stitch pattern count differently?
Designers may count stitches, spaces, edge chains or full repeats differently. Read the pattern’s counting notes rather than combining two sets of instructions.
Keep the completed swatch and label it with your yarn and hook. It becomes a reliable reference for future projects—and a reminder that neat edges come from understanding the row, not from working faster.
If your sample curls beyond a slightly uneven edge, use our crochet curling troubleshooting guide to identify the cause before changing the stitch.
Illustrative photography: Karina L via Unsplash. Terminology reference: Craft Yarn Council. Original guide written for Yarvella Crochet.
Keep making

Easy Crochet Christmas Ornaments: 5 Free Beginner Patterns
Make 5 easy crochet Christmas ornaments: a candy cane, bauble, star, mini hat and holly, with free beginner patterns in US terms, tips…
Read the guide
Gifts for Crocheters: 30 Ideas They’ll Actually Use (by Budget)
The best gifts for crocheters, sorted by budget: ergonomic hooks, yarn tools, project bags, stocking stuffers and handmade ideas, plus how to buy…
Read the guide