
Crochet Christmas Stocking: Easy Free Pattern for Beginners
Make a cozy crochet Christmas stocking in one evening with this free beginner pattern: chunky yarn, simple rows, a ribbed cuff, sizing tips and FAQ.
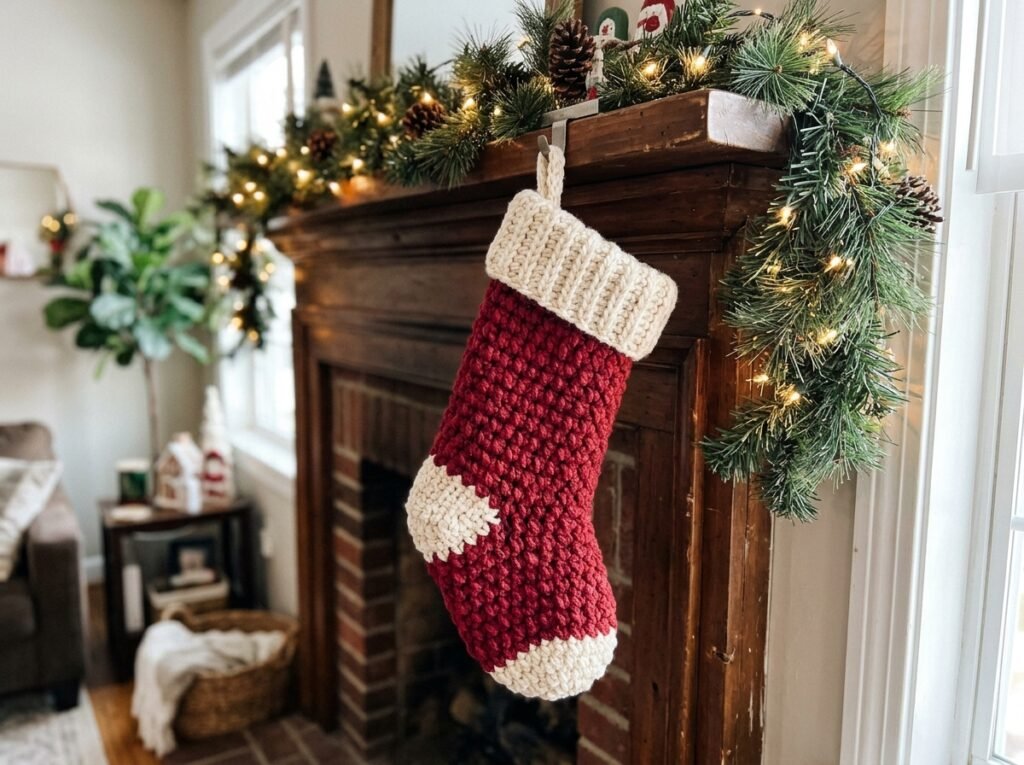
There is something about a handmade stocking on the mantel that makes the whole room feel like Christmas. A crochet Christmas stocking is also one of the most satisfying holiday projects you can make: it uses simple stitches, chunky yarn works up fast, and you end up with something your family will pull out of the decoration box every December for years.
This guide walks you through an easy, beginner-friendly stocking made from two flat panels in single crochet, joined together and finished with a soft ribbed cuff and a hanging loop. No turning a heel, no complicated shaping, and you can finish it in one cozy evening. You’ll also find yarn and hook advice, sizing tips, ways to personalize it with a name, and answers to the questions people ask most about crocheting stockings.
What’s in this guide
- Why a crochet Christmas stocking is a great beginner project
- Materials: yarn, hook and supplies
- Pattern details, gauge and finished size
- Free easy crochet Christmas stocking pattern
- How to personalize your stocking
- Mini, standard and large stocking sizes
- Common mistakes and how to fix them
- Crochet Christmas stocking FAQ
Why a crochet Christmas stocking is a great beginner project
Many stocking patterns look intimidating because they are worked in the round with a turned heel, like a real sock. That approach is lovely, but it isn’t necessary. A flat-panel stocking gives you the same classic boot shape with far less stress:
- One main stitch. The body is all single crochet, worked in rows. If you can make a straight row, you can make this stocking.
- Easy to check your work. Flat panels are simple to count and measure, so mistakes are caught early.
- Fast results. Chunky (bulky weight) yarn and a 6.5 mm hook build height quickly.
- Endless variations. Change colors, add stripes, stitch on a name or an appliqué, and every family member gets a stocking that looks like theirs.
If you are brand new to the hook, start with our step-by-step first crochet lesson and practice a small swatch of single crochet before you begin. Ten minutes of practice makes the stocking panels much more even.
Materials: yarn, hook and supplies
- Main color (MC): bulky weight yarn (weight 5), about 200 yards. A classic red, forest green or cream all look great.
- Contrast color (CC): bulky weight yarn (weight 5), about 60 yards for the cuff and optional heel and toe patches.
- Hook: 6.5 mm (US K-10½). Go up or down a size if needed to match gauge.
- Yarn needle for weaving in ends.
- Stitch markers (2–4).
- Scissors and a measuring tape.
- Optional: a small jingle bell, a wooden tag or a pom-pom for decoration.
What is the best yarn for a crochet Christmas stocking?
For a stocking that will be filled and hung, choose a yarn that is sturdy, washable and holds its shape. Acrylic or an acrylic-wool blend in bulky weight is the most practical choice: it is affordable, comes in every holiday color, doesn’t stretch much under the weight of small gifts, and can be washed if it gets dusty over the years.
100% wool gives a beautiful heirloom look but can felt if washed carelessly. Cotton is very stable but heavier and less cozy. Velvet and chenille yarns look luxurious, but their stitches are hard to see, so save them for your second stocking. Whatever you pick, avoid very splitty or fuzzy yarn for your first try.
How much yarn do you need for a crochet stocking?
For the standard size in this pattern (about 16 inches tall), plan on roughly 200 yards of main color and 60 yards of contrast in bulky yarn. That is usually one large skein of main color plus a small skein of contrast. Yardage changes with your tension and the exact yarn, so it is always smart to buy one extra skein of the main color from the same dye lot. A mini ornament stocking needs only 20–30 yards in total, which makes it a great scrap-buster.
Pattern details, gauge and finished size
- Skill level: Easy (advanced beginner for the ribbed cuff; a simple beginner cuff option is included).
- Time: about 3–4 hours.
- Gauge: 11 sc and 12 rows = 4 inches (10 cm) with a 6.5 mm hook. Gauge doesn’t need to be perfect, but a tighter fabric looks neater and holds gifts better.
- Finished size: about 16 inches tall from heel to top of cuff, 6.5 inches wide across the leg, and about 10 inches from heel to toe.
- Terms: US crochet terms.
Abbreviations (US terms)
- ch – chain
- sl st – slip stitch
- sc – single crochet
- sc2tog – single crochet two together (decrease)
- hdc – half double crochet
- dc – double crochet
- FPdc / BPdc – front post / back post double crochet
- st(s) – stitch(es)
- MC / CC – main color / contrast color
Need a refresher on any of these? Keep our crochet abbreviations cheat sheet (US vs UK terms) open in another tab while you work.
Free easy crochet Christmas stocking pattern
The stocking is made of two identical boot-shaped panels. You work each panel from the sole up: first the wide foot, then the narrower leg. The two panels are joined with single crochet around the edge, and the cuff is worked in rounds around the opening.
Pattern notes: The ch 1 at the start of each row does not count as a stitch. Count your stitches at the end of every row for the first few rows; it is the easiest way to keep edges straight.
Step 1: Crochet the foot (make 2 panels)
With MC, ch 26.
- Row 1: sc in 2nd ch from hook and in each ch across, turn. (25 sts)
- Row 2: ch 1, 2 sc in first st, sc in each st across to last st, 2 sc in last st, turn. (27 sts)
- Rows 3–8: ch 1, sc in each st across, turn. (27 sts)
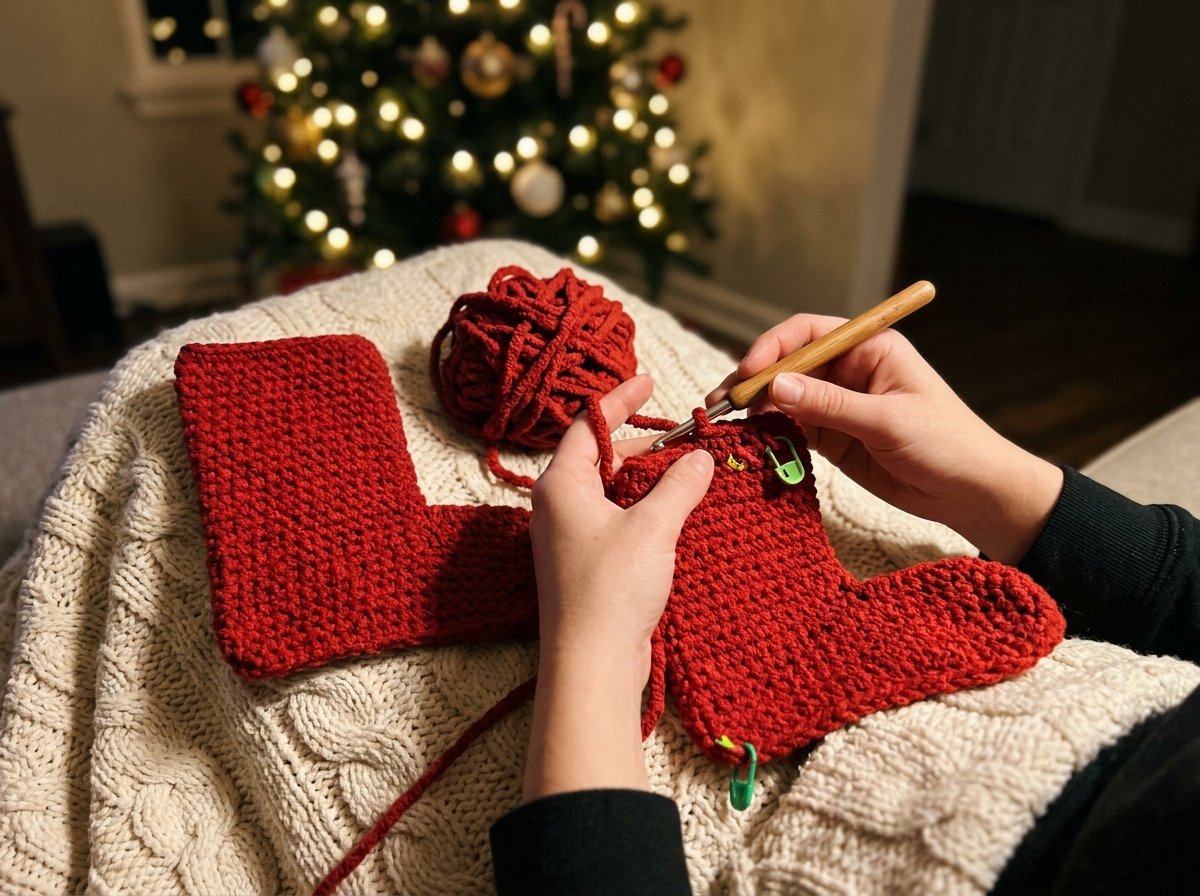
Your piece is now a rectangle about 10 inches long and a little under 3 inches tall. The increases in Row 2 slightly round the bottom corners of the heel and toe.
Step 2: Shape the top of the toe
- Row 9: ch 1, sc in each of the first 17 sts, sc2tog over the next 2 sts, turn, leaving the remaining 8 sts unworked. (18 sts)
The 8 unworked stitches form the top of the toe. The 18 stitches you just worked become the leg of the stocking. Place a stitch marker on the first stitch of Row 9 so you remember which side is the back (heel) edge.
Step 3: Crochet the leg
- Rows 10–37: ch 1, sc in each st across, turn. (18 sts)
Fasten off and leave a short tail. The panel should now measure about 12 inches from the bottom of the foot to the top of the leg. If you want a longer stocking, simply add more rows here; every 3 rows adds roughly 1 inch.
Make a second panel exactly the same way. Single crochet looks almost identical on both sides, so you don’t need a mirrored version: just stack the two panels so their edges line up.
Step 4: Join the two panels
Weave in all tails except the ones at the top edge. Stack the panels with the edges matching. With CC (or MC for an invisible seam), join yarn at the top of the leg on the back (heel) edge, working through both layers at once.
- ch 1, sc evenly down the back edge, working about 1 sc in the end of each row.
- Work 3 sc in the rounded heel corner, sc along the sole in each stitch, then 3 sc in the toe corner.
- Continue sc up the front edge of the toe, across the 8 unworked toe stitches, and up the front edge of the leg to the top.
- Fasten off. Leave the top open.
Single crochet worked through both layers creates a neat, slightly raised seam that frames the stocking shape. If you prefer a flatter look, join with slip stitches instead, or sew the panels together with a whipstitch using your yarn needle.
Step 5: Add the cuff
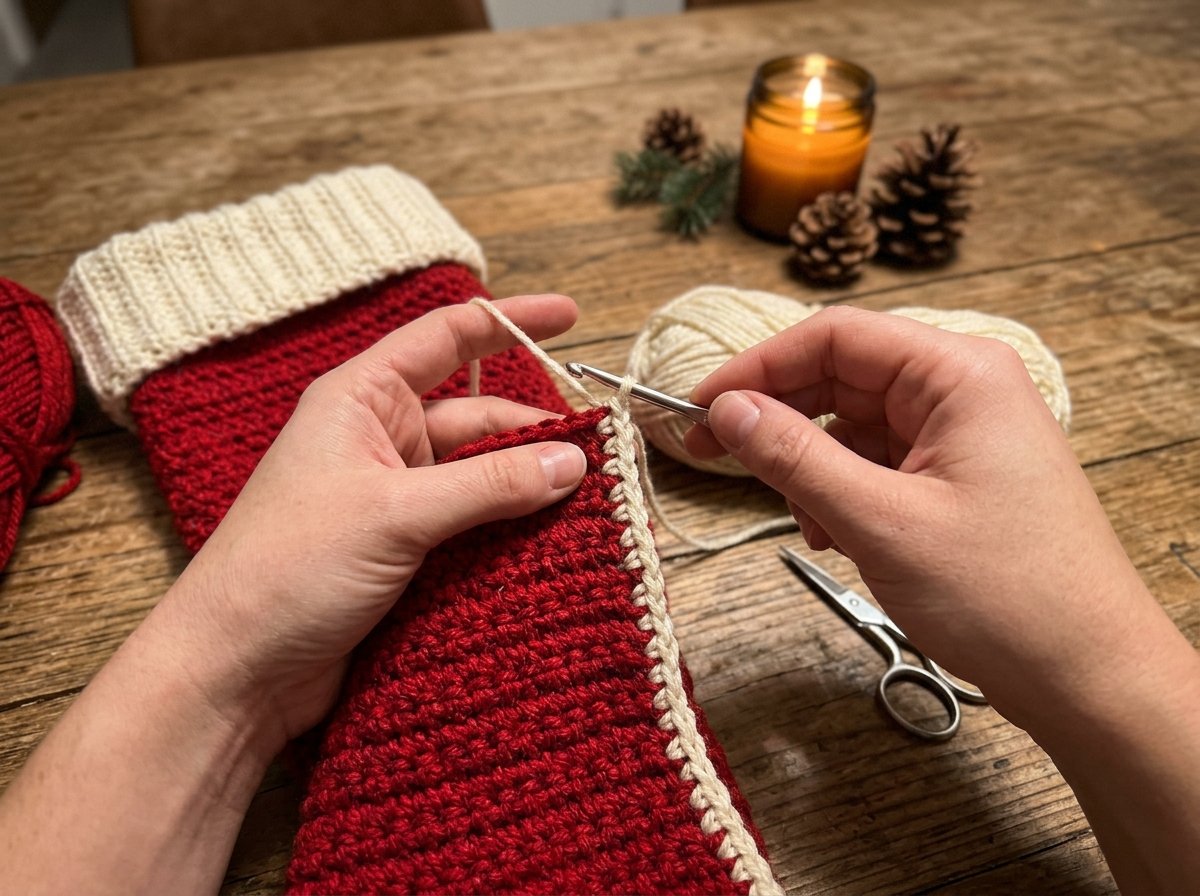
The cuff is worked in joined rounds around the top opening. Join CC at the back seam.
- Round 1: ch 1, sc in each st around the opening (18 sts on each panel), sl st to first sc to join. (36 sts)
- Round 2: ch 2 (does not count as a st), dc in each st around, sl st to first dc to join. (36 sts)
- Rounds 3–8: ch 2, *FPdc around the next st, BPdc around the next st; repeat from * around, sl st to first st to join. (36 sts)
Because 36 is an even number, the front post and back post stitches stack neatly and create vertical ribbing that looks like a knitted cuff. Fasten off.
Beginner cuff option: skip the post stitches and work Rounds 2–8 as ch 1, half double crochet in each st around, sl st to join. It gives a soft, smooth band that is just as cozy.
Step 6: Make the hanging loop
Join CC at the top of the cuff on the back seam. Ch 12, then sl st into the same stitch to form a loop. Work 14–16 sc into the loop to make it sturdy, sl st to the cuff and fasten off. Weave in all remaining ends securely, since this stocking will be pulled and filled every year.
Optional heel and toe patches: with CC, make two small half-circles (ch 2, 6 sc in 2nd ch from hook, then work one more row of 2 sc in each st, without joining into a full circle) and sew one over the heel corner and one over the toe for a traditional look.
How to personalize your crochet stocking
Personalizing is where a homemade stocking really shines. Here are easy ways to make each one unique:
- Add a name with surface slip stitch. Lightly chalk the letters on the cuff (use the beginner hdc cuff for a smoother surface), then hold the yarn behind the work and slip stitch along your chalk line from the front. Simple capital letters are the easiest to read.
- Embroider with a yarn needle. Chain stitch or backstitch embroidery in worsted weight yarn shows up clearly on bulky single crochet.
- Use a tag. A wooden or leather tag tied to the hanging loop is the quickest way to label stockings for a big family.
- Stripes. Change colors every 2 or 4 rows in the leg for a candy-cane look. Carry the unused yarn up the side; the seam will hide it.
- Appliqués. Sew on a small crocheted snowflake or star. Our easy 3-round crochet snowflake fits perfectly on the leg.
- Bells and pom-poms. Stitch a jingle bell to the toe or a pom-pom to the hanging loop. Skip small bells on stockings meant for babies and toddlers.
Mini, standard and large stocking sizes
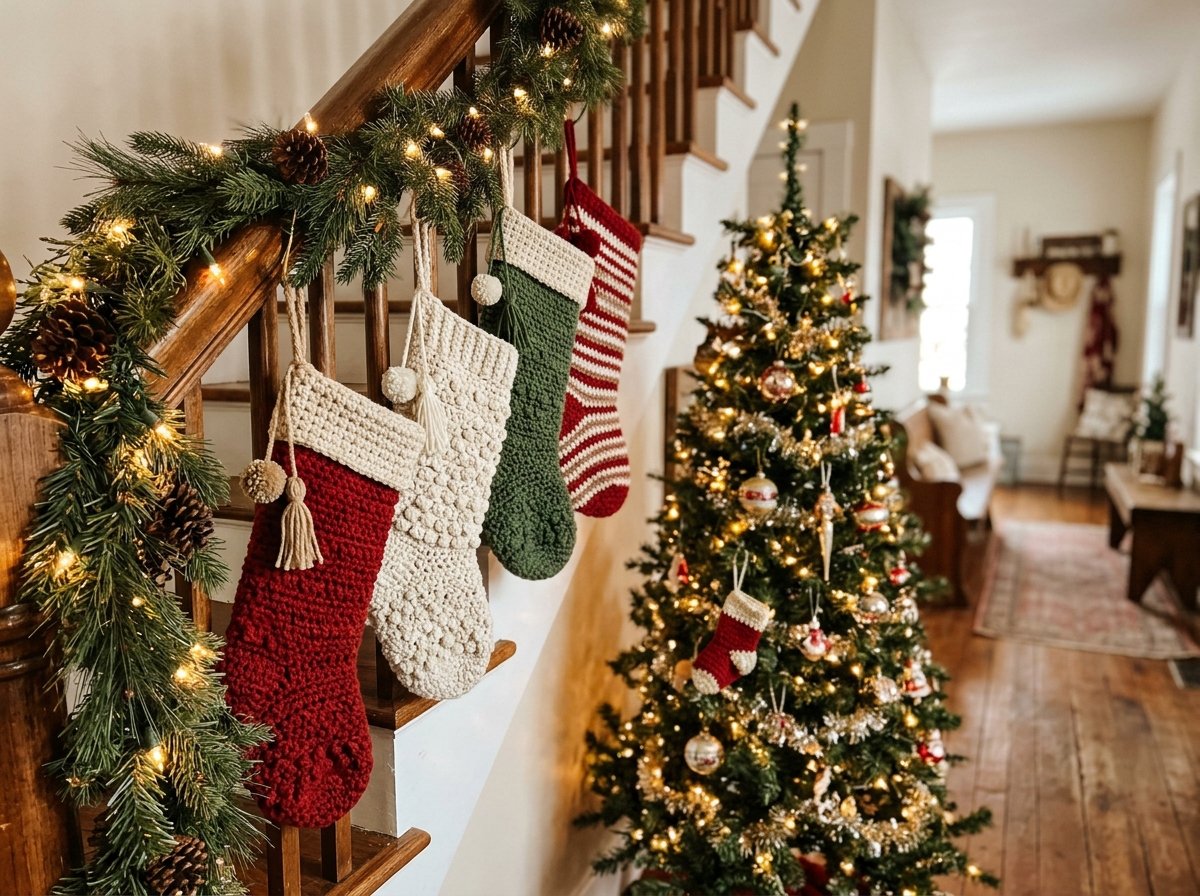
Because the stocking is built from a simple rectangle-plus-leg shape, it is easy to resize:
How to crochet a mini Christmas stocking ornament
Use worsted weight yarn (weight 4) and a 4.5 mm hook. Ch 13 and work Row 1 (12 sts). Row 2: increase in the first and last st (14 sts). Work 2 more rows even. Row 5: sc in the first 8 sts, sc2tog, turn (9 sts). Work about 10 rows even for the leg, then join and add a 3-round cuff. The result is roughly 4–5 inches tall, perfect for gift cards, tree ornaments or quick Christmas gifts you can make in one evening. If you’d like a fully written, photo-guided version with a classic cuff, heel and toe, our Mini Christmas Stocking crochet pattern PDF is available in the Yarvella store.
How big should a Christmas stocking be?
There is no official size, but most store-bought stockings fall somewhere between 15 and 20 inches tall. The standard version in this pattern (about 16 inches) fits a typical mantel hook and holds small treats, ornaments and gift cards. For a large stocking, keep the same stitch counts and add 9–12 more rows to the leg, which adds about 3–4 inches in height. To make it wider, add 3 stitches to the starting chain and 3 more stitches to the leg (and 6 more stitches to the cuff rounds) for roughly 1 extra inch of width.
Common mistakes and how to fix them
- Panels with wavy or slanted edges. This usually means stitches are being added or lost at the ends of rows. Remember that the ch 1 doesn’t count, and work the last stitch into the top of the last sc, not into the turning chain. Count every row until it becomes automatic.
- The two panels are different sizes. Tension often changes between the first and second panel. Measure the first panel and compare as you go; if the second one comes out longer, remove a row or two before joining.
- Curling foot. A tight starting chain pulls the bottom edge and makes the panel curl. Work your chain with a hook one size larger, or read our guide on why crochet curls and how to fix it.
- Gaps in the seam. When joining, insert the hook under both loops of both layers. At the corners, 3 sc in one spot keeps the curve smooth without gaps.
- Cuff that flares. If the ribbing ripples, your post stitches are looser than your sc. Go down a hook size for the cuff only.
- Stocking stretching when filled. A loose fabric sags. Use acrylic or a blend rather than pure cotton, and consider a hook half a size smaller for a firmer fabric.
Tips for a professional-looking finish
- Weave in ends inside the seam allowance so they’re hidden when the stocking is turned around.
- Lightly steam the panels (holding the iron above the fabric, never pressing acrylic) before joining. They will lie flatter and match better.
- Join the panels with the contrast color for a crisp outline, or with the main color for a seamless look.
- If you’re making a whole family set, write your row counts and color changes on a sticky note so every stocking ends up the same size.
Looking for more holiday makes after your stocking? You’ll find printable PDF crochet patterns, from amigurumi ornaments to cozy home décor, in the Yarvella Crochet pattern store.
Crochet Christmas stocking FAQ
How do you crochet a Christmas stocking for beginners?
The easiest method is the one in this guide: crochet two flat boot-shaped panels in single crochet, join them together around the edge, then add a cuff in rounds and a hanging loop. You only need chain, single crochet and slip stitch for the body, so there is no heel to turn.
How long does it take to crochet a Christmas stocking?
With bulky yarn and a 6.5 mm hook, a standard stocking takes most crocheters about 3–4 hours, including joining and weaving in ends. A mini ornament stocking takes around 30–45 minutes. Patterns with colorwork or textured stitches take longer.
What size hook do I need for a crochet stocking?
Match the hook to the yarn weight. For bulky (weight 5) yarn, use a 6.5 mm (K-10½) hook; for worsted (weight 4), use 5 mm (H-8) for a full-size stocking or 4.5 mm for a mini. Choose the smaller end of the yarn label’s range so the fabric is firm enough to hold gifts.
Can you crochet a Christmas stocking in one piece?
Yes. Some patterns work the stocking in the round from the cuff down or the toe up, with a short-row or afterthought heel, so there is no seam. These are great once you’re comfortable with crocheting in rounds, but the two-panel method is easier to measure and fix for beginners.
Can you wash a crochet Christmas stocking?
Follow the care instructions on your yarn label. Most acrylic yarns can be machine washed on a gentle cycle in a laundry bag and laid flat to dry. Wool should be hand washed in cool water to avoid felting. Remove bells and other decorations first.
How do you add a name to a crochet stocking?
Chalk the letters on the cuff and slip stitch along the lines from the front, or embroider them with a yarn needle using chain stitch or backstitch. A tied-on wooden or leather name tag is the quickest option.
What are some easy things to crochet for Christmas besides stockings?
Ornaments are the classic quick win: try our crochet Christmas tree ornament, snowflakes, or a little amigurumi snowman. Hats, mug cozies and dishcloths are also fast projects that make lovely handmade gifts.
Hang it up and enjoy
A crochet Christmas stocking is proof that simple stitches can make something truly special. Start with one in your favorite color, then make a matching set for the whole family, add names, stripes or a little snowflake, and you’ll have a holiday tradition that grows every year. Grab your chunky yarn, put on a Christmas movie, and by the end of the evening you’ll have a stocking ready for the mantel.
Happy hooking, and merry Christmas from all of us at Yarvella!
Keep making

Easy Crochet Christmas Ornaments: 5 Free Beginner Patterns
Make 5 easy crochet Christmas ornaments: a candy cane, bauble, star, mini hat and holly, with free beginner patterns in US terms, tips…
Read the guide
Gifts for Crocheters: 30 Ideas They’ll Actually Use (by Budget)
The best gifts for crocheters, sorted by budget: ergonomic hooks, yarn tools, project bags, stocking stuffers and handmade ideas, plus how to buy…
Read the guide